Self-hosted Sonatype Nexus repository OSS
- Version 3.77.1-01
- Added installation as TrueNAS app
- Updated reverse proxy with multiple VLANs and IPv6
- Improved reverse proxy to private Docker repo
- Consolidated Apt repositories for Debian and Ubuntu
- Apt repository now working for Ubuntu desktop too
In my homelab I run "many" VM's and LXC containers with Debian and Ubuntu as operating system. Those OS's need to be kept up to date regularly. My internet connection is pretty fast, currently I have a symmetric 200 Mbit fiber connection, but I thought it still a waste to download all those Apt packages multiple times. Couldn't they be cached locally instead?
I had seen that on AWS EC2 and Lightsail instances Apt updates and packages would be downloaded from an AWS domain, which suggested they run their own Apt server. This would definitely make sense. Now, I'm not a cloud provider, so my savings will be much smaller. Still some caching would be cool.
With Apt you can run your own mirror. This means downloading the full apt repository (for your specific distirbution) and keeping it in sync with (mirrored) the upstream repository. I don't know how big this repository is, but this looked also wasteful to me. I only need some packages, not all of them.
That's when I found Sonatype Nexus Repository. As the name suggest, this is a repository manager. You can create private repositories, but it can also do "proxy" repositories. The latter is what I was looking for. You configuring your server to connect to this proxy, which in turn connects to the upstream. The proxy caches packages and pulls them from the upstream transparently. The client doesn't see the difference. Nexus can do a lot more than just Apt. I ended up configuring Apt, Docker, Npm and Nuget repositories.
Installation
Docker
Initially I choose to run Nexus using Docker with an NFS share to my NAS to store all the repository data. I ran Docker in an LXC container which made adding the NFS share a little bit more challenging. But in the end it works beautifully.
The compose file is really simple. Define the volume mapping for the NFS share with the Nexus data. And open port: 9081 for the WebGUI,.
services:
  nexus:
    image: sonatype/nexus3
    volumes:
      - "/mnt/nexus-data:/nexus-data"
    ports:
      - "9081:8081"
TrueNAS
I figured it made more sense to run Nexus on my NAS directly, but Nexus is not available in the TrueNAS catalog, so you have to create your own custom app. With the release of TrueNAS Scale 24.10, apps run as Docker containers, so this has become much easier.
Create a dataset
- Go to Datasets –> Add Dataset
- Name:
application-data - Dataset Preset:
Generic
- Name:
- Select the
application-datadataset –> Add Dataset- Name:
nexus - Dataset Preset:
Apps
- Name:
- Select the
nexusdataset –> Permission –> Edit- Click
Add Itembutton - Owner:
200, Owner Group:200, Apply Owner:selected, Apply Group:selected - Click
Save Access Control Listbutton - Confirm:
selectand Continue
- Click
Create Custom App
Go to Apps –> Discover Apps –> Custom App.
- Application name:
- Application Name:
nexus
- Application Name:
- Image Configuration
- Repository:
sonatype/nexus3 - Tag:
latest
- Repository:
- Container Configuration
- Hostname:
nexus - Timezone:
UTC(I left it at the default; the same as the VM/server running TrueNAS) - Restart Policy:
Unless Stopped
- Hostname:
- Security Context Configuration
- Custom User:
checked - User ID:
200 - Group ID:
200
- Custom User:
- Network Configuration
- Container Port:
8081 - Host Port:
9081 - Protocol:
TCP
- Container Port:
- Storage Configuration
- Type:
Host Path - Mount Path:
/nexus-data - Host Path:
/mnt/pool1/application-data/nexus
- Type:
- Resource Configuration
- Enable Resource Limits:
selected - CPUs:
4(2is be fine too for normal use, but Nexus starts quicker with more) - Memory (in MB):
4096(Nexus will use all the memory it gets, so limit it)
- Enable Resource Limits:
- Press Install button
Network
Make sure TrueNAS has an IPv4 address on each vlan. The Docker apps implementation will listen on all of them (0.0.0.0).
Initial configuration
DNS + Reverse proxy
In an upcoming post I will go into more detail about my current setup with regards to DNS, TLS certificates, firewall and reverse proxies. I use PiHole Technitium as my DNS server in which I can configure Local DNS zones. In here I pointed nexus.joeplaa.com and nexus<xx>.joeplaa.com to the IP addresses of my reverse proxy.
sonatype.jodibooks.com. This is the same Nexus installation, which I initially only used for jodiBooks. Later I added a DNS entry and reverse proxy for nexus.joeplaa.com. But basically for me they are interchangeble. It does matter in the reverse proxy location blocks though. There the path should match the repository name.The reverse proxy terminates the internal HTTPS connection on each vlan (10, 20, etc.) and passes the request on to the VM/TrueNAS running Docker on the same vlan to port 9081. By doing this my router is not involved and the shortest route/path is taken. In theory this should get me the fastest download speeds.
I use Nginx as my reverse proxy of choice and below is the config I use for Nexus. I plan on explaining more about all the Nginx settings I use in another post, however for now know that this was my main source.
upstream backend_nexus10 {
    zone upstreams 64K;
    keepalive 2;

    # Truenas doesn't support IPv6 for apps (yet)
    server 10.33.10.10:9081 max_fails=1 fail_timeout=2;
}
upstream backend_nexus20 {
    zone upstreams 64K;
    keepalive 2;

    # Truenas doesn't support IPv6 for apps (yet)
    server 10.33.20.10:9081 max_fails=1 fail_timeout=2;
}
upstream backend_nexus30 {
    zone upstreams 64K;
    keepalive 2;

    # Truenas doesn't support IPv6 for apps (yet)
    server 10.33.30.10:9081 max_fails=1 fail_timeout=2;
}

# https://help.sonatype.com/en/running-behind-a-reverse-proxy.html
#keepalive_timeout  5 5;
#tcp_nodelay        on;
proxy_intercept_errors off;

server {
    listen [::]:80;
    server_name nexus.joeplaa.com nexus10.joeplaa.com nexus20.joeplaa.com nexus30.joeplaa.com sonatype.joeplaa.com;

    return 301 https://$host$request_uri;
}

server {
    listen [fdc3:40c9:680f:30:<NGINX ADDRESS>]:443 ssl;
    http2 on;
    server_name nexus.joeplaa.com sonatype.joeplaa.com;

    # Allow internal
    allow 10.33.10.0/24;
    allow 10.33.20.0/24;
    allow 10.33.30.0/24;
    allow fdc3:40c9:680f:10::/64;
    allow fdc3:40c9:680f:20::/64;
    allow fdc3:40c9:680f:30::/64;
    # Deny external
    deny all;

    # https://help.sonatype.com/en/running-behind-a-reverse-proxy.html
    keepalive_timeout  5 5;
    proxy_send_timeout 120;
    proxy_read_timeout 300;
    proxy_buffering    off;
    proxy_request_buffering off;

    # allow large uploads of files - refer to nginx documentation
    client_max_body_size 2G;
    # optimize downloading files larger than 1G - refer to nginx doc before adjusting
    proxy_max_temp_file_size 2048m;

    location ~ ^/(v1|v2)/ {
        rewrite ^/(.*)$ /repository/docker-group/$1 last;
    }

    location / {
        # Proxy settings
        include /etc/nginx/config/_location/proxy-headers.conf;

        proxy_pass http://backend_nexus30/;
        proxy_next_upstream error timeout http_500;
    }

    # Reverse proxy settings
    real_ip_header X-Forwarded-For;
    set_real_ip_from 127.0.0.1;
    set_real_ip_from 10.33.0.0/16;
    set_real_ip_from fdc3:40c9:680f::/48;

    # Logs
    access_log /var/log/nginx/nexus-joeplaa-com_access.log;
    error_log /var/log/nginx/nexus-joeplaa-com_error.log;

    # SSL
    ssl_certificate /home/joeplaa/cert/joeplaa.com.fullchain;
    ssl_certificate_key /home/joeplaa/cert/joeplaa.com.all.pem;
    ssl_trusted_certificate /home/joeplaa/cert/joeplaa.com.fullchain;
}

server {
    listen [fdc3:40c9:680f:10:<NGINX ADDRESS>]:443 ssl;
    http2 on;
    server_name nexus10.joeplaa.com;

    # Allow internal
    allow 10.33.10.0/24;
    allow fdc3:40c9:680f:10::/64;
    # Deny external
    deny all;

    # https://help.sonatype.com/en/running-behind-a-reverse-proxy.html
    keepalive_timeout  5 5;
    proxy_send_timeout 120;
    proxy_read_timeout 300;
    proxy_buffering    off;
    proxy_request_buffering off;

    # allow large uploads of files - refer to nginx documentation
    client_max_body_size 2G;
    # optimize downloading files larger than 1G - refer to nginx doc before adjusting
    proxy_max_temp_file_size 2048m;

    location ~ ^/(v1|v2)/ {
        rewrite ^/(.*)$ /repository/docker-group/$1 last;
    }

    location / {
        # Proxy settings
        include /etc/nginx/config/_location/proxy-headers.conf;

        proxy_pass http://backend_nexus10/;
        proxy_next_upstream error timeout http_500;
    }

    # Reverse proxy settings
    real_ip_header X-Forwarded-For;
    set_real_ip_from 127.0.0.1;
    set_real_ip_from 10.33.10.0/24;
    set_real_ip_from fdc3:40c9:680f:10::/64;

    # Logs
    access_log /var/log/nginx/nexus10-joeplaa-com_access.log;
    error_log /var/log/nginx/nexus10-joeplaa-com_error.log;

    # SSL
    ssl_certificate /home/joeplaa/cert/joeplaa.com.fullchain;
    ssl_certificate_key /home/joeplaa/cert/joeplaa.com.all.pem;
    ssl_trusted_certificate /home/joeplaa/cert/joeplaa.com.fullchain;
}

server {
    listen [fdc3:40c9:680f:20:<NGINX ADDRESS>]:443 ssl;
    http2 on;
    server_name nexus20.joeplaa.com;

    # Allow internal
    allow 10.33.20.0/24;
    allow fdc3:40c9:680f:20::/64;
    # Deny external
    deny all;

    # https://help.sonatype.com/en/running-behind-a-reverse-proxy.html
    keepalive_timeout  5 5;
    proxy_send_timeout 120;
    proxy_read_timeout 300;
    proxy_buffering    off;
    proxy_request_buffering off;

    # allow large uploads of files - refer to nginx documentation
    client_max_body_size 2G;
    # optimize downloading files larger than 1G - refer to nginx doc before adjusting
    proxy_max_temp_file_size 2048m;

    location ~ ^/(v1|v2)/ {
        rewrite ^/(.*)$ /repository/docker-group/$1 last;
    }

    location / {
        # Proxy settings
        include /etc/nginx/config/_location/proxy-headers.conf;

        proxy_pass http://backend_nexus20/;
        proxy_next_upstream error timeout http_500;
    }

    # Reverse proxy settings
    real_ip_header X-Forwarded-For;
    set_real_ip_from 127.0.0.1;
    set_real_ip_from 10.33.20.0/24;
    set_real_ip_from fdc3:40c9:680f:20::/64;

    # Logs
    access_log /var/log/nginx/nexus20-joeplaa-com_access.log;
    error_log /var/log/nginx/nexus20-joeplaa-com_error.log;

    # SSL
    ssl_certificate /home/joeplaa/cert/joeplaa.com.fullchain;
    ssl_certificate_key /home/joeplaa/cert/joeplaa.com.all.pem;
    ssl_trusted_certificate /home/joeplaa/cert/joeplaa.com.fullchain;
}

server {
    listen [fdc3:40c9:680f:30:<NGINX ADDRESS>]:443 ssl;
    http2 on;
    server_name nexus30.joeplaa.com;

    # Allow internal
    allow 10.33.30.0/24;
    allow fdc3:40c9:680f:30::/64;
    # Deny external
    deny all;

    # https://help.sonatype.com/en/running-behind-a-reverse-proxy.html
    keepalive_timeout  5 5;
    proxy_send_timeout 120;
    proxy_read_timeout 300;
    proxy_buffering    off;
    proxy_request_buffering off;

    # allow large uploads of files - refer to nginx documentation
    client_max_body_size 2G;
    # optimize downloading files larger than 1G - refer to nginx doc before adjusting
    proxy_max_temp_file_size 2048m;

    location ~ ^/(v1|v2)/ {
        rewrite ^/(.*)$ /repository/docker-group/$1 last;
    }

    location / {
        # Proxy settings
        include /etc/nginx/config/_location/proxy-headers.conf;

        proxy_pass http://backend_nexus30/;
        proxy_next_upstream error timeout http_500;
    }

    # Reverse proxy settings
    real_ip_header X-Forwarded-For;
    set_real_ip_from 127.0.0.1;
    set_real_ip_from 10.33.30.0/24;
    set_real_ip_from fdc3:40c9:680f:30::/64;

    # Logs
    access_log /var/log/nginx/nexus30-joeplaa-com_access.log;
    error_log /var/log/nginx/nexus30-joeplaa-com_error.log;

    # SSL
    ssl_certificate /home/joeplaa/cert/joeplaa.com.fullchain;
    ssl_certificate_key /home/joeplaa/cert/joeplaa.com.all.pem;
    ssl_trusted_certificate /home/joeplaa/cert/joeplaa.com.fullchain;
}
Users + permissions + Realms
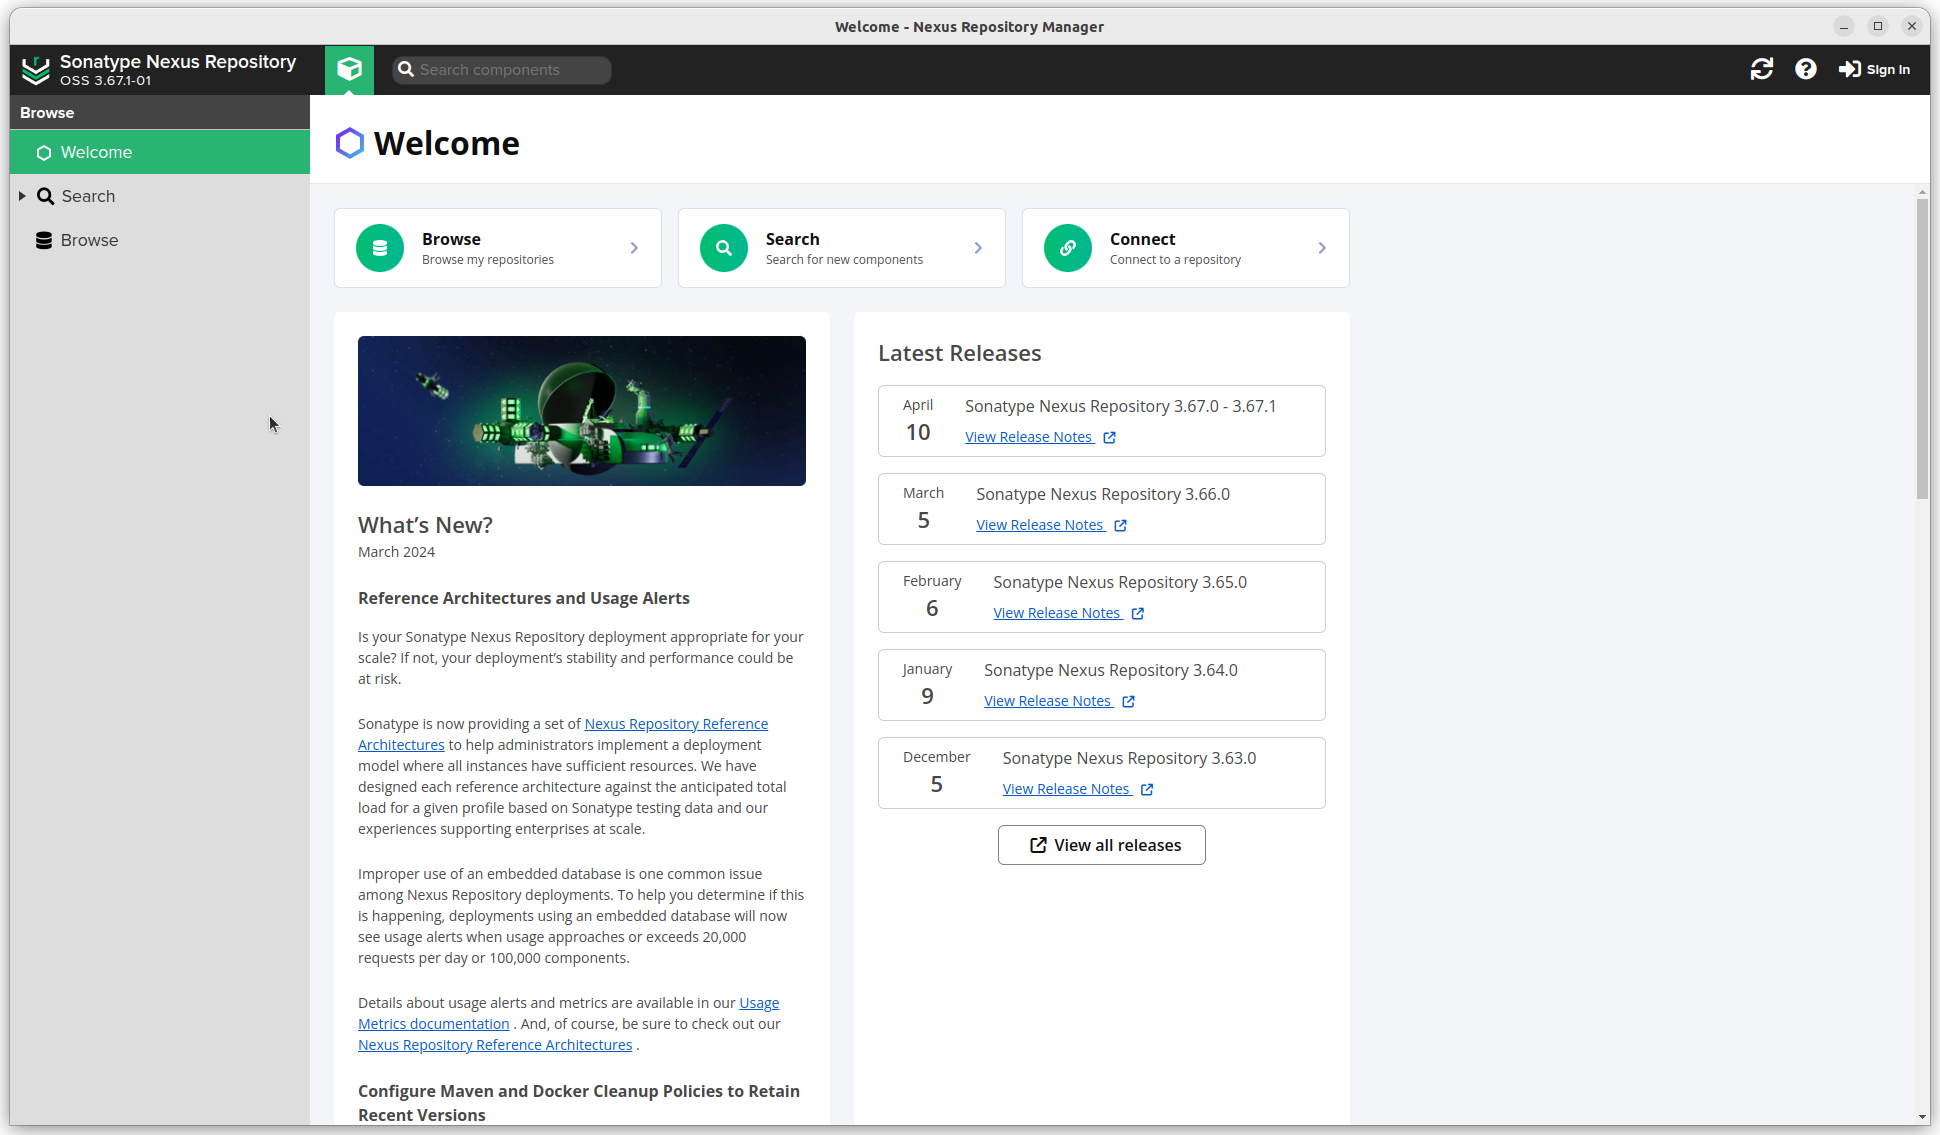
Open a browser and goto the address specified for your Nexus instance, in my case nexus.joeplaa.com. You should be greeted with a website.
To log in you need to find the admin password first. This is a randomly generated password stored in the "data directory ($data-dir, typically sonatype-work/nexus3) in a file called admin.password" (https://help.sonatype.com/en/post-install-checklist.html#1---change-the-admin-password). In our case /mnt/nexus-data.
I'm writing this after using Nexus for 2-3 years now, so I don't remember if there was an onboarding wizard. If so, nice! If not, we have to do the configuration ourselves step by step. I hope I get all the steps in the correct order. As said, I'm now copying my working configuration, which took me a long time to converge on.
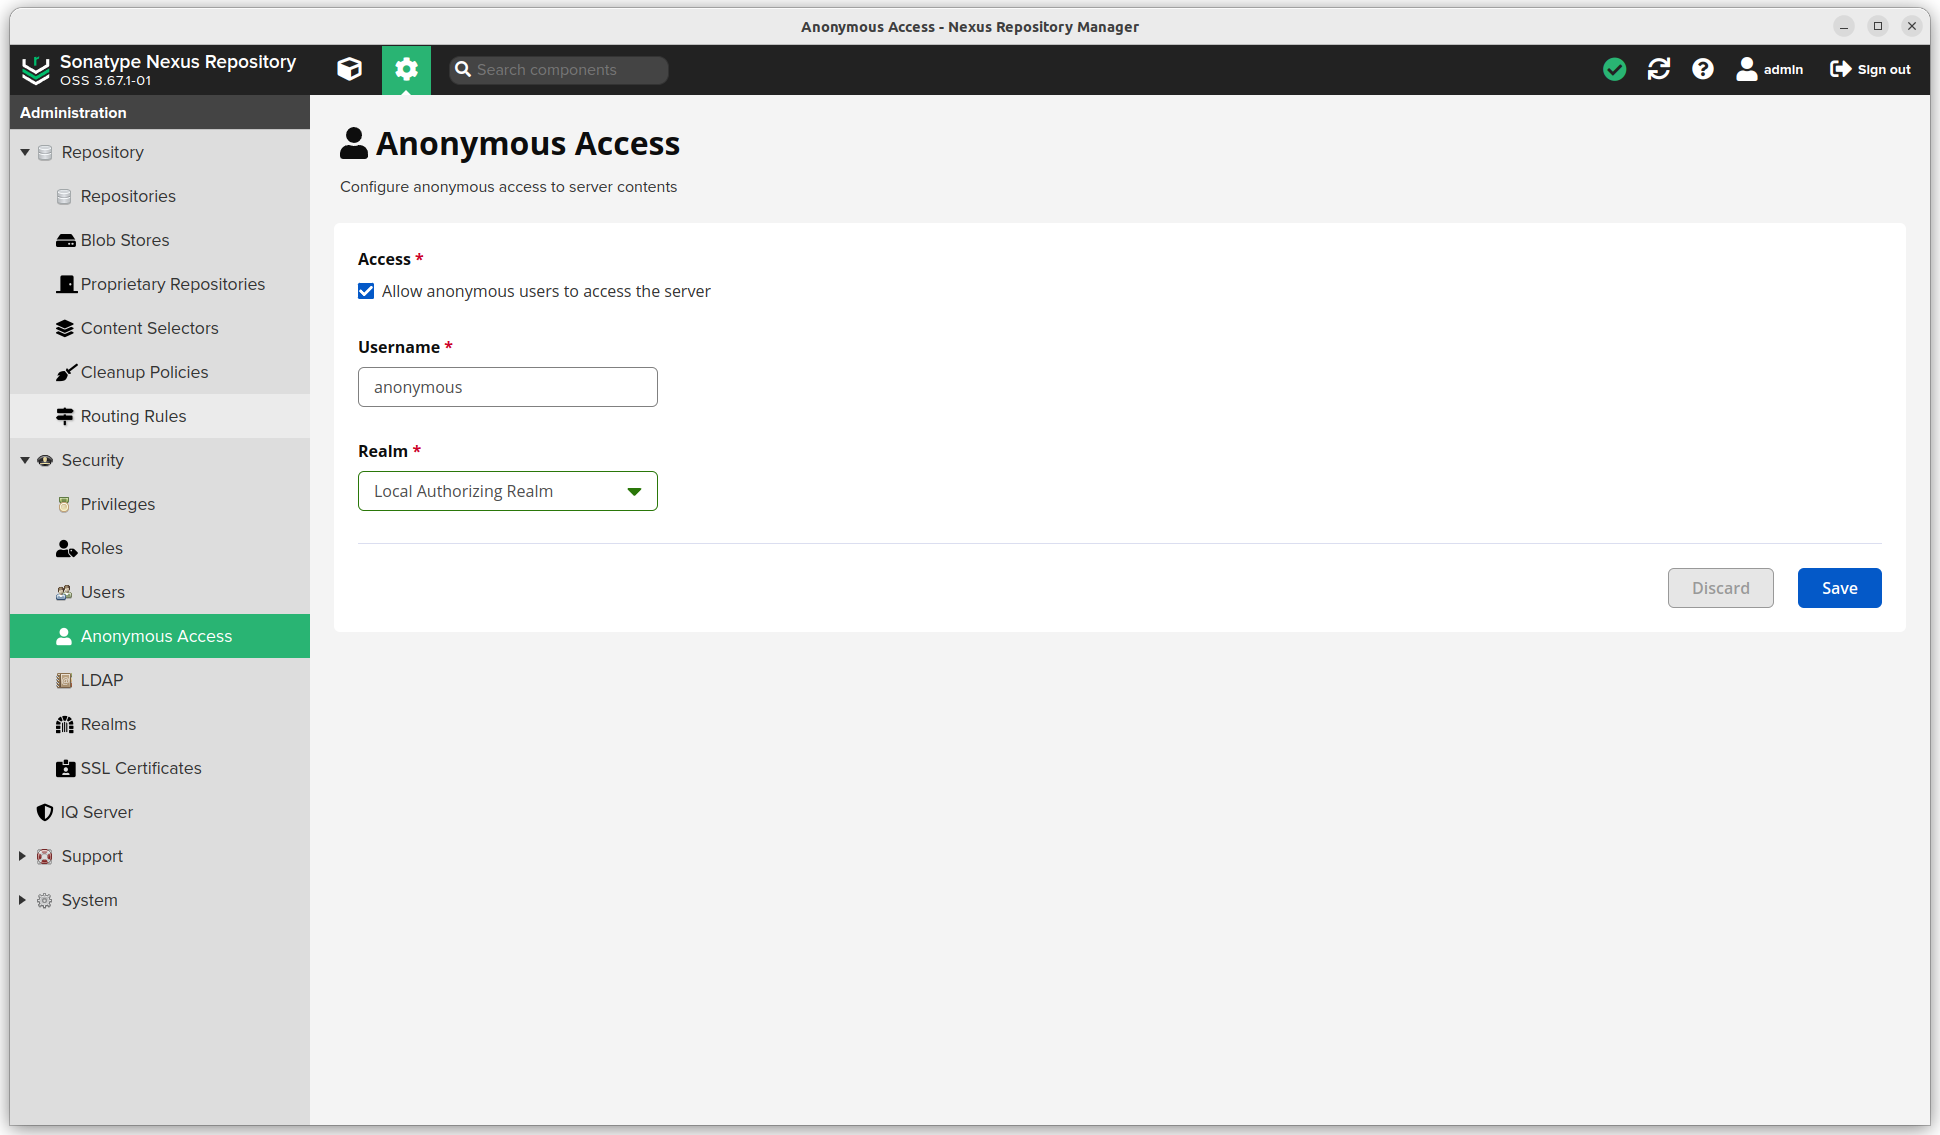
- Click the settings sprocket next to the search bar and go to "Security".
- Anonymous Access. We don't want our servers to have to login everytime. Reading is always allowed. That's also a reason why I don't expose this service to the internet.
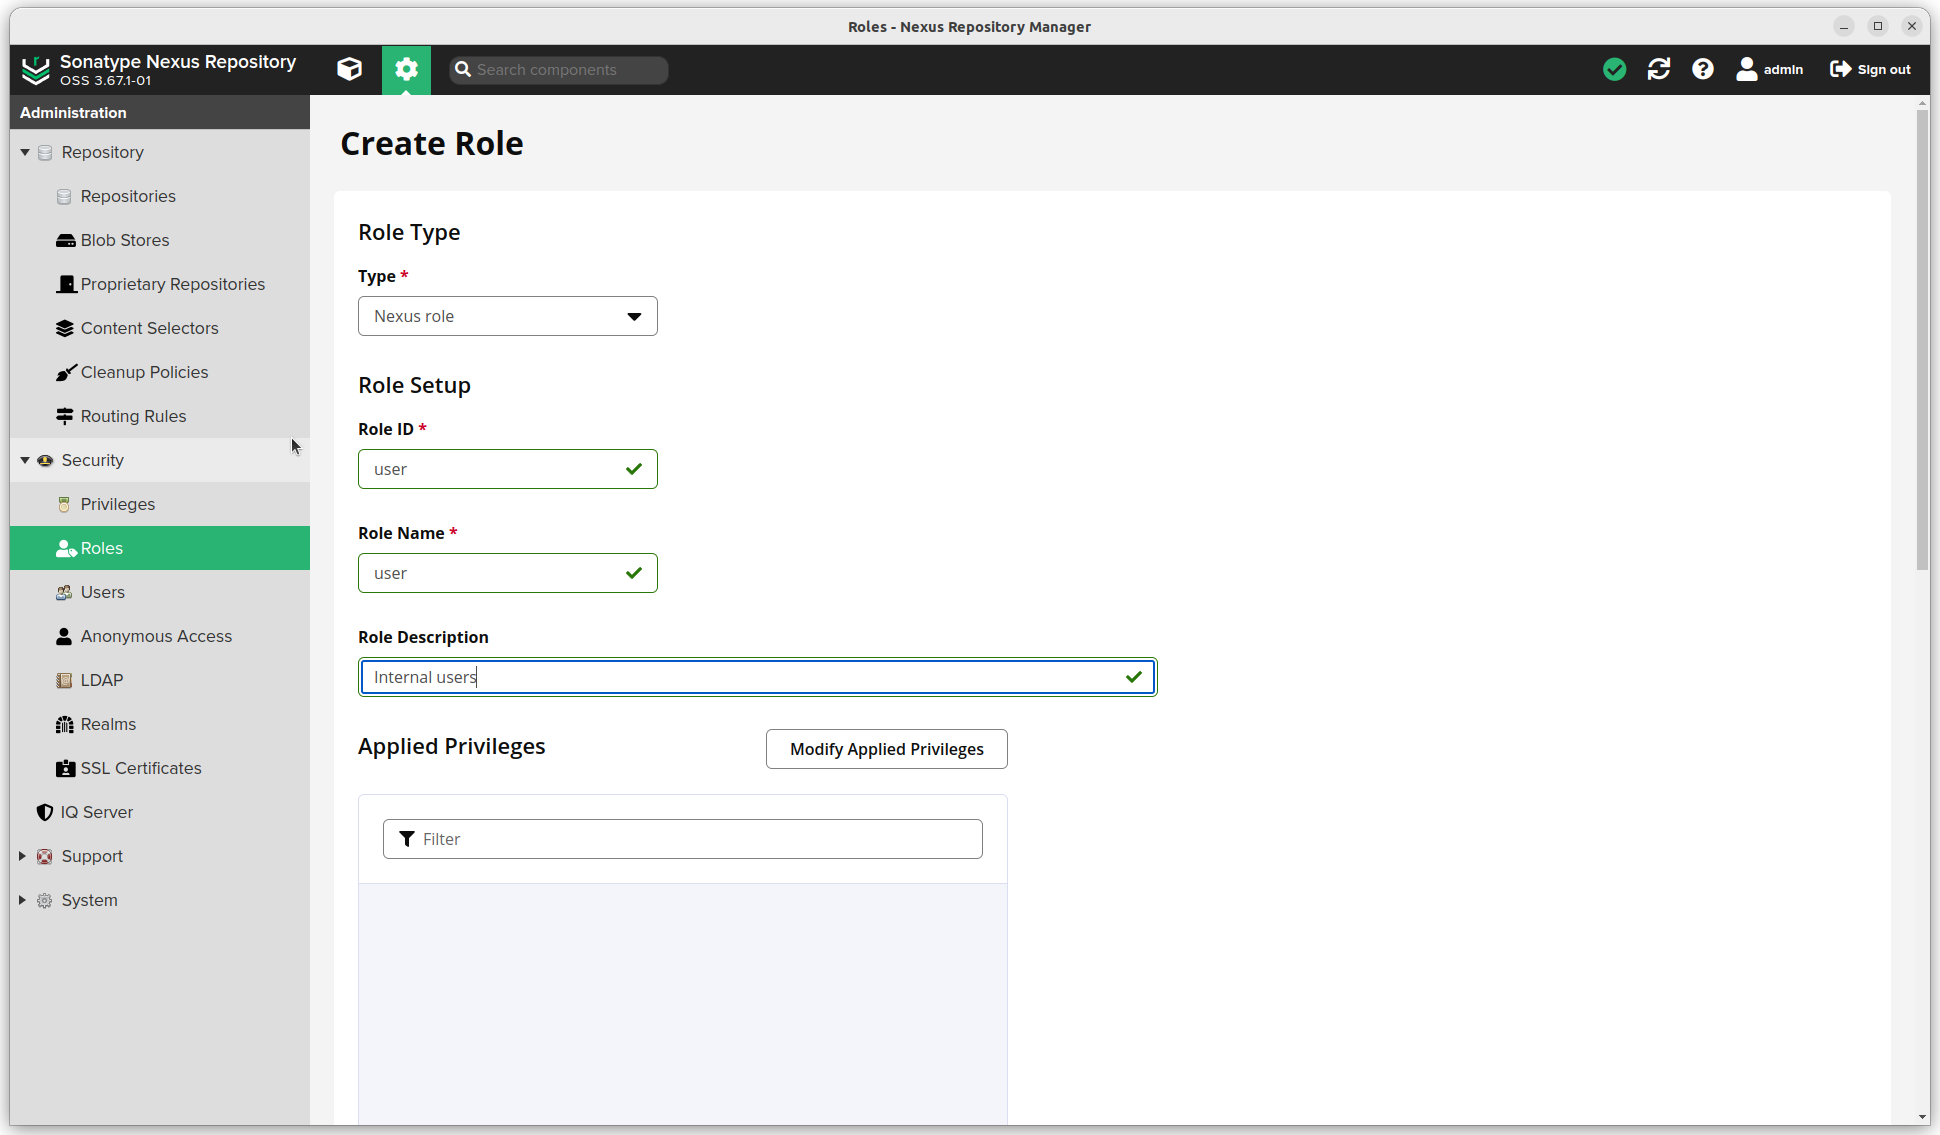
- Roles. There should be an
nx-adminandnx-anonymousrole. Create a new roleuser.
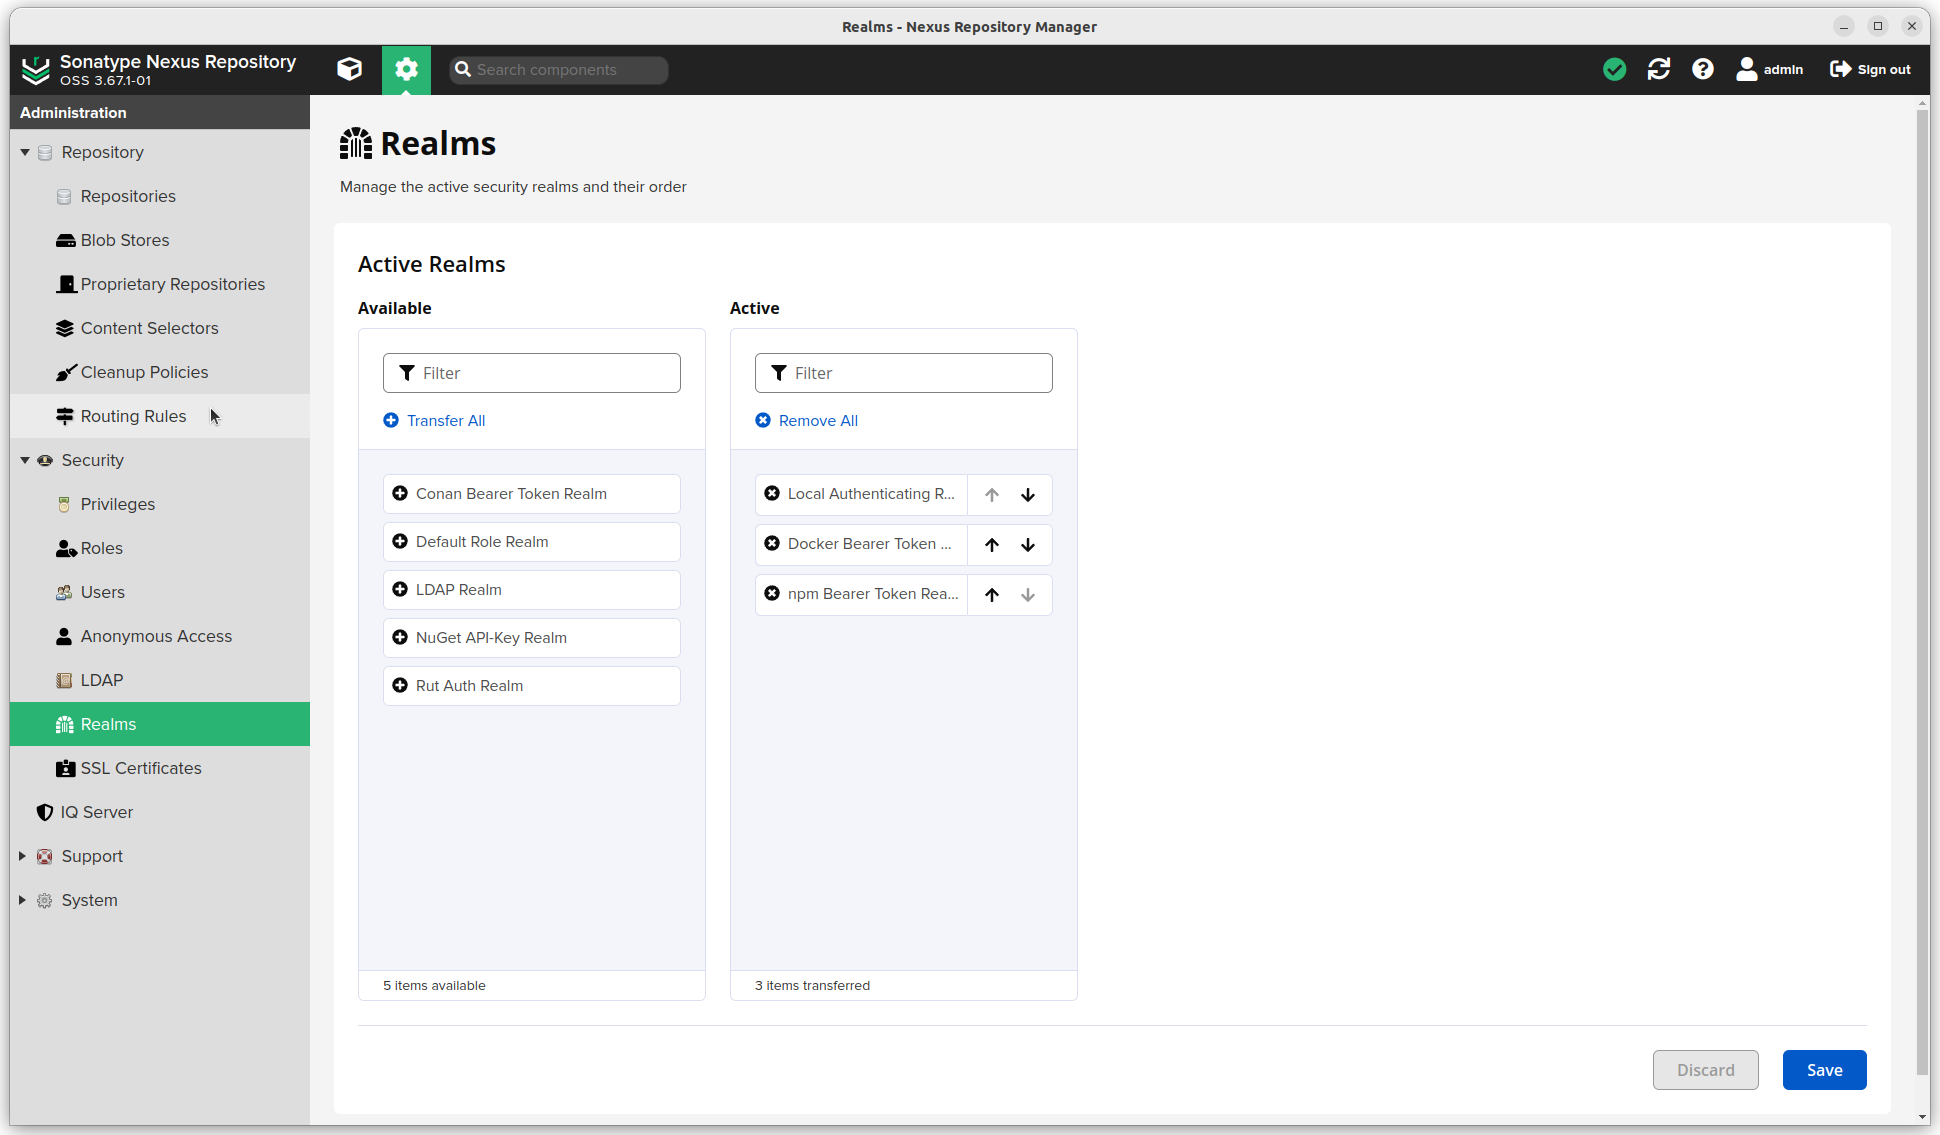
- Realms: I will be using Docker and npm, so added these too. Local Authentication is a must.
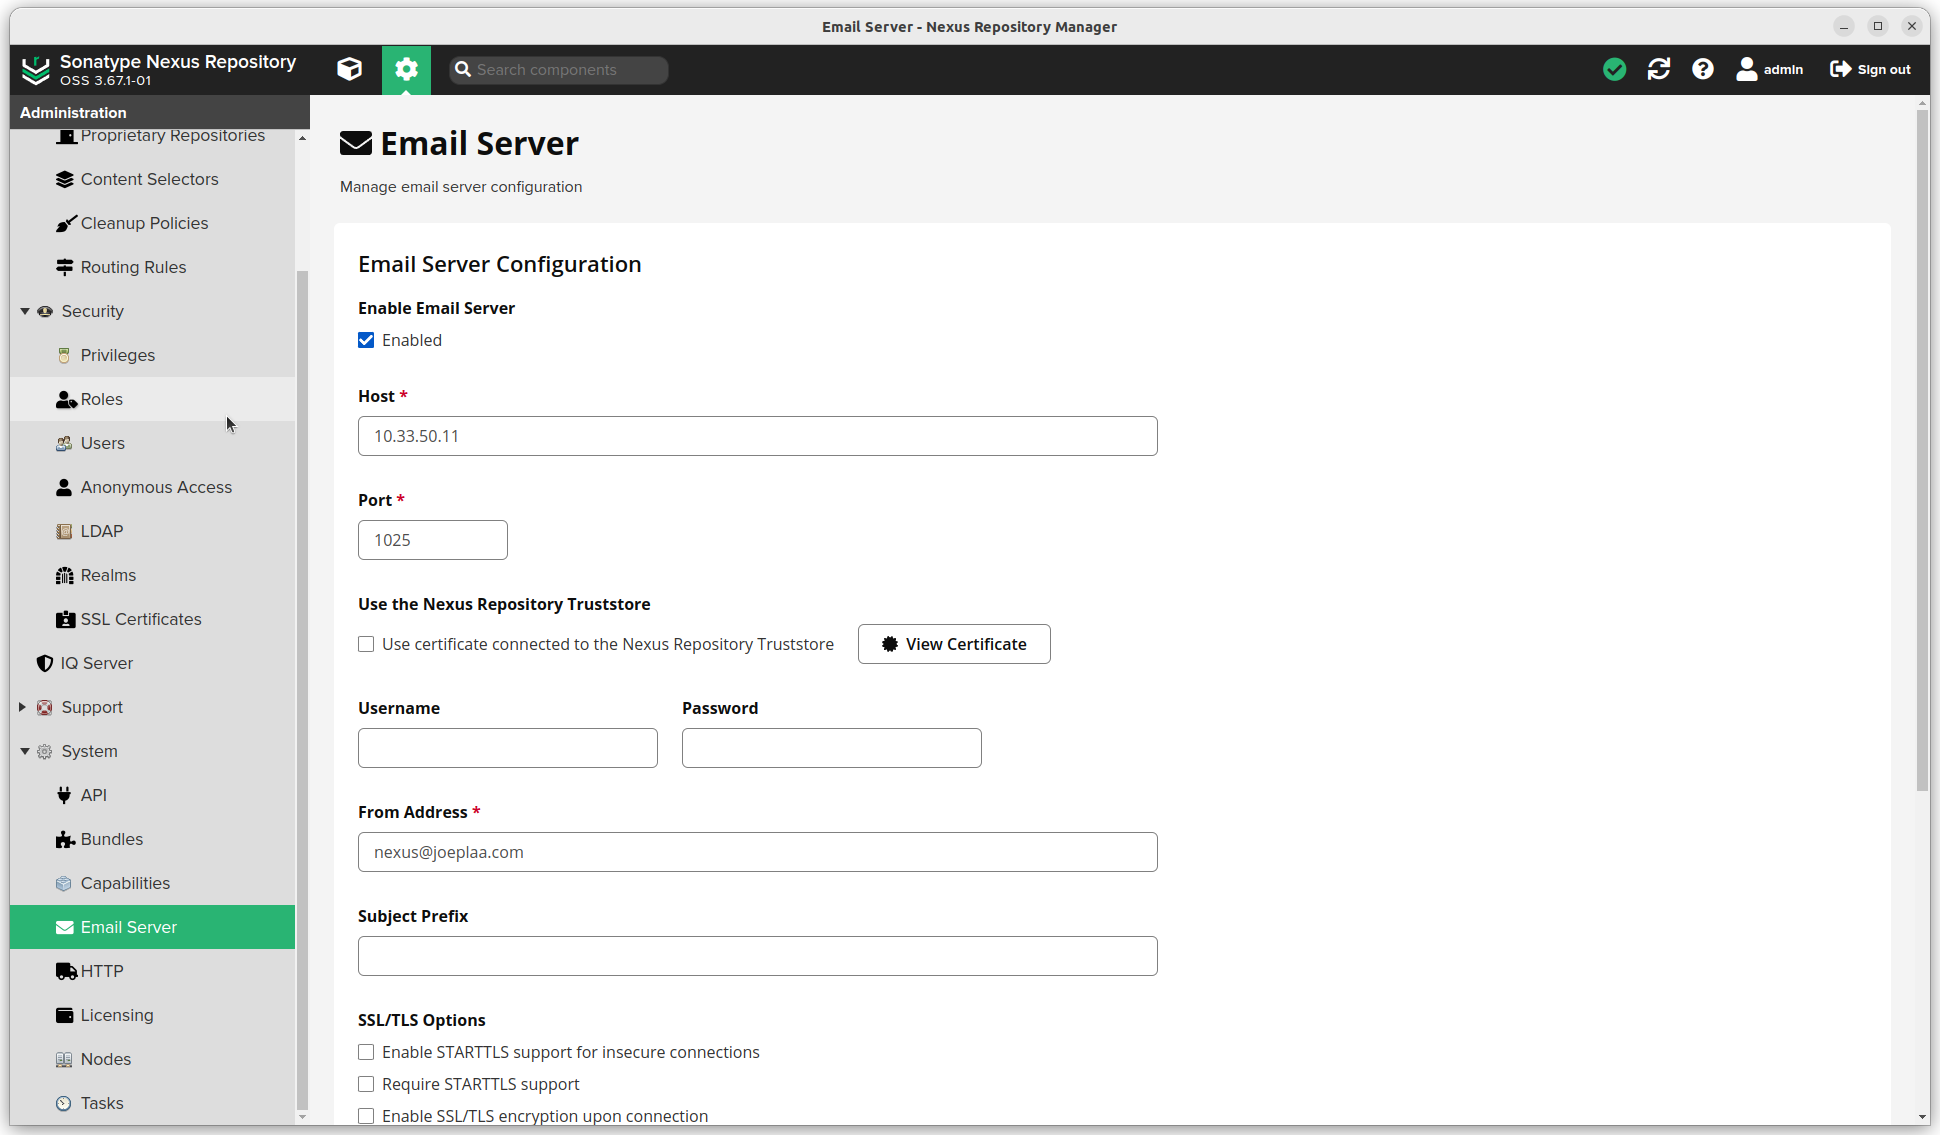
Email server
- (Click the settings sprocket next to the search bar and) go to "System".
- Email server. Enable this if you want Nexus to send emails. I run an smtp relay that forwards email I want to send to AWS SES, my email service. Settings will be different for Gmail or other mail services.
Blob store
- (Click the settings sprocket next to the search bar and) go to "Repository".
- Blob Stores. I created multiple blob stores, one for each repository type (
docker-groupis useless, but I can't change it now that a repository is linked). I think you can use only one, but I like to see how much data each type is consuming.
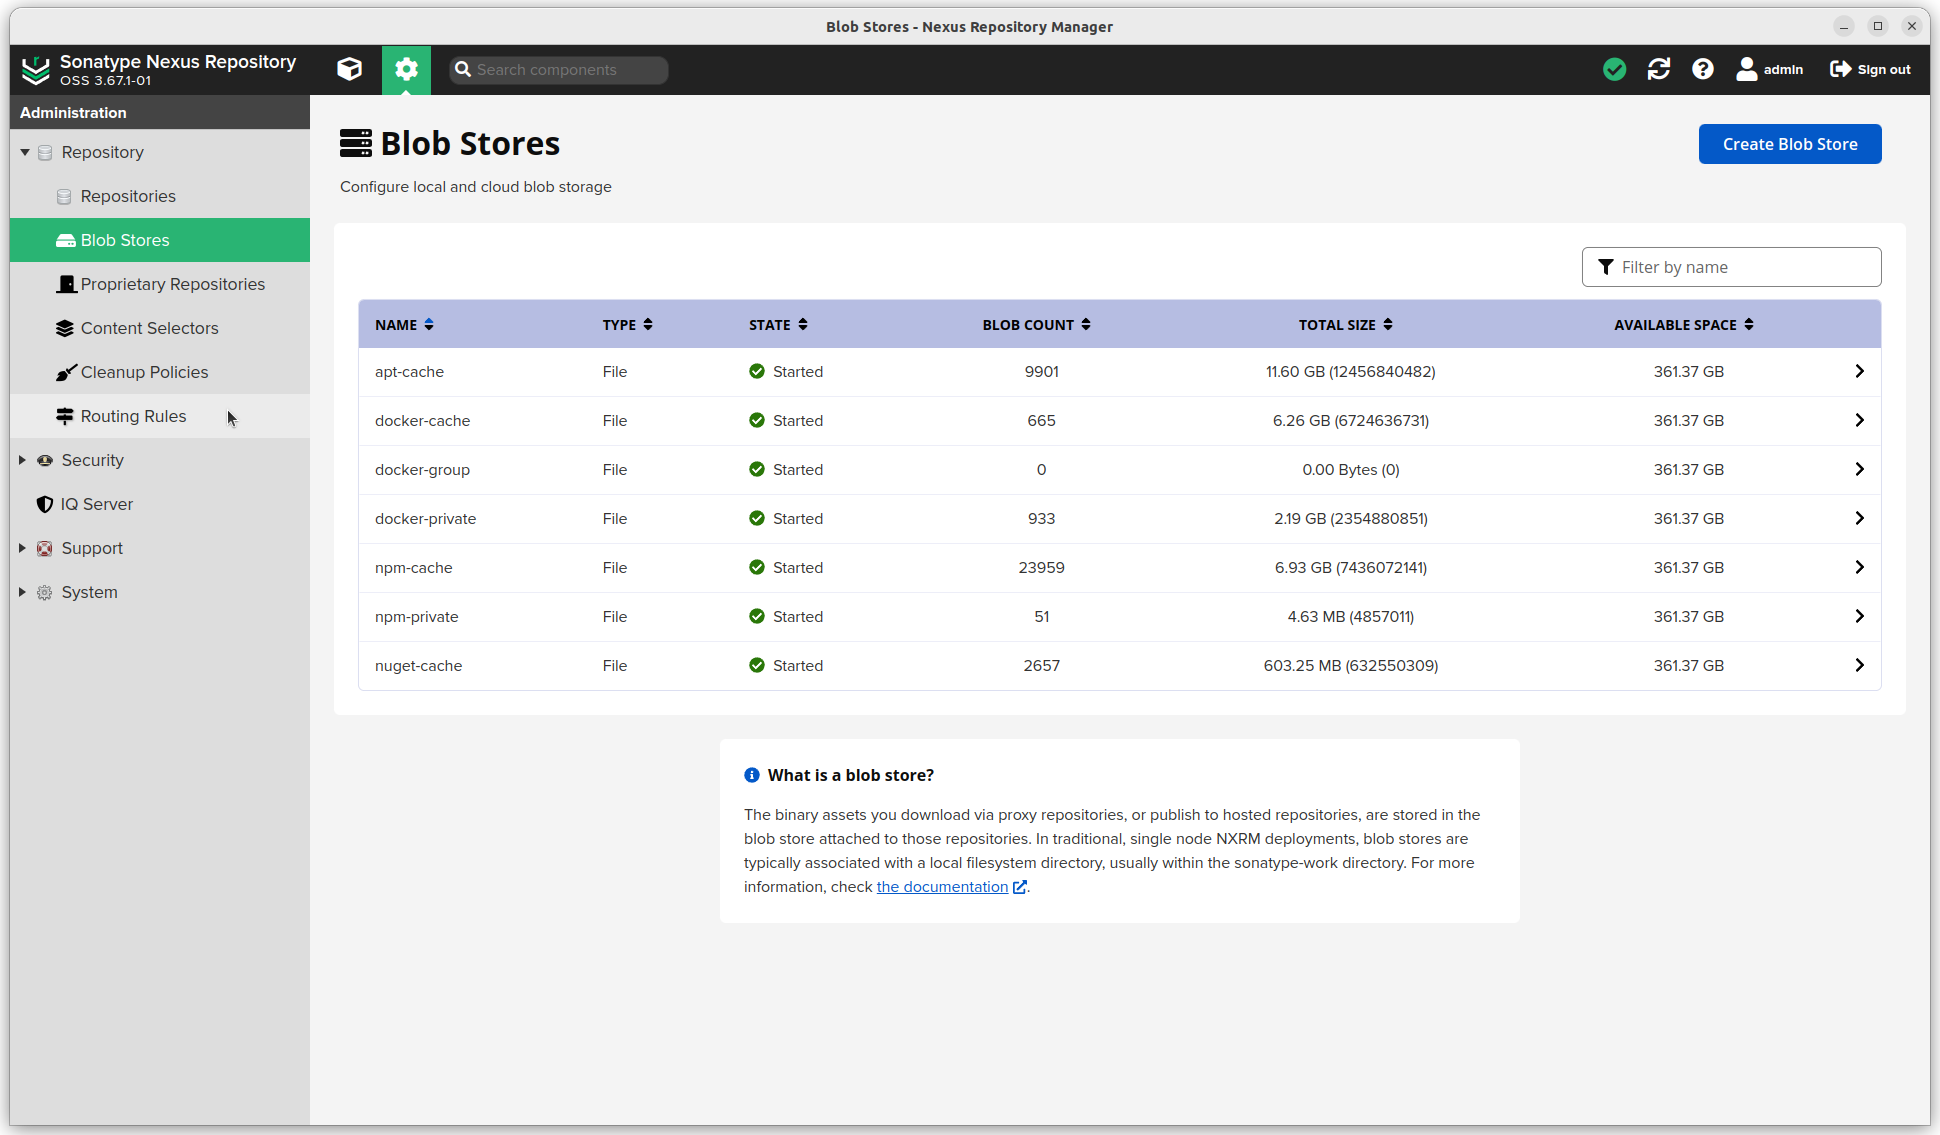
- Cleanup policies. These will be used later to clean up unused packages from the proxy repositories.

Repository configuration
Finally, we're getting somewhere.
Apt proxy
Let's start with the one it all started with for me.
Update: You can now create a single repository for an OS and download multiple versions. For example you can download Focal, Jammy and Noble from a single Ubuntu repository.
File has unexpected sizeThis seems to be fixed. I can now use Nexus for my Ubuntu desktop as well.
- Click the settings sprocket next to the search bar and go to "Repository".
- Click Repositories
- Click the Create repository button. A long list of options is available.
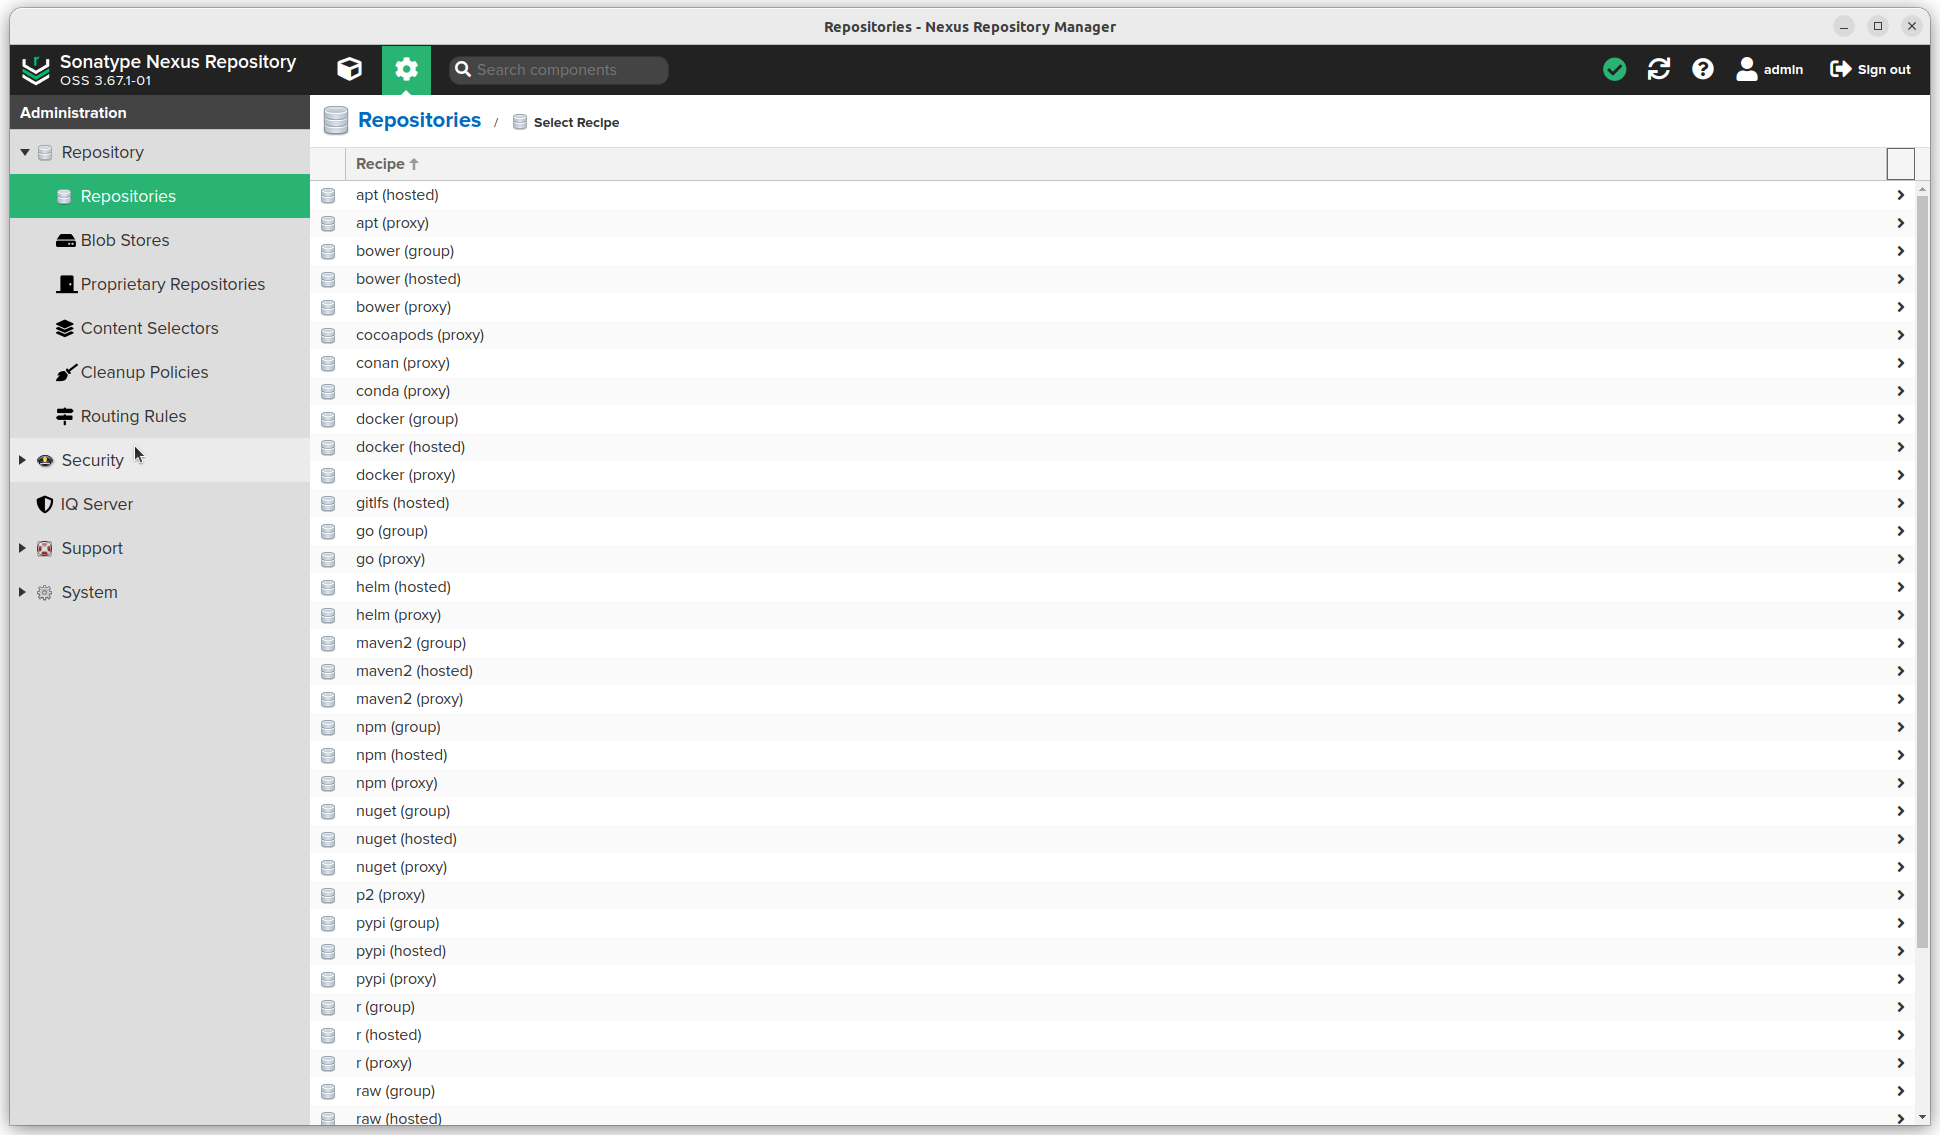
- We want "apt (proxy)"
- Enter a name (this will be used in the url), the Distribution and the Remote storage url. In this example we use Ubuntu which I want to download from my local ubuntu mirror. The distribution doesn't matter, so enter for example
jammy.
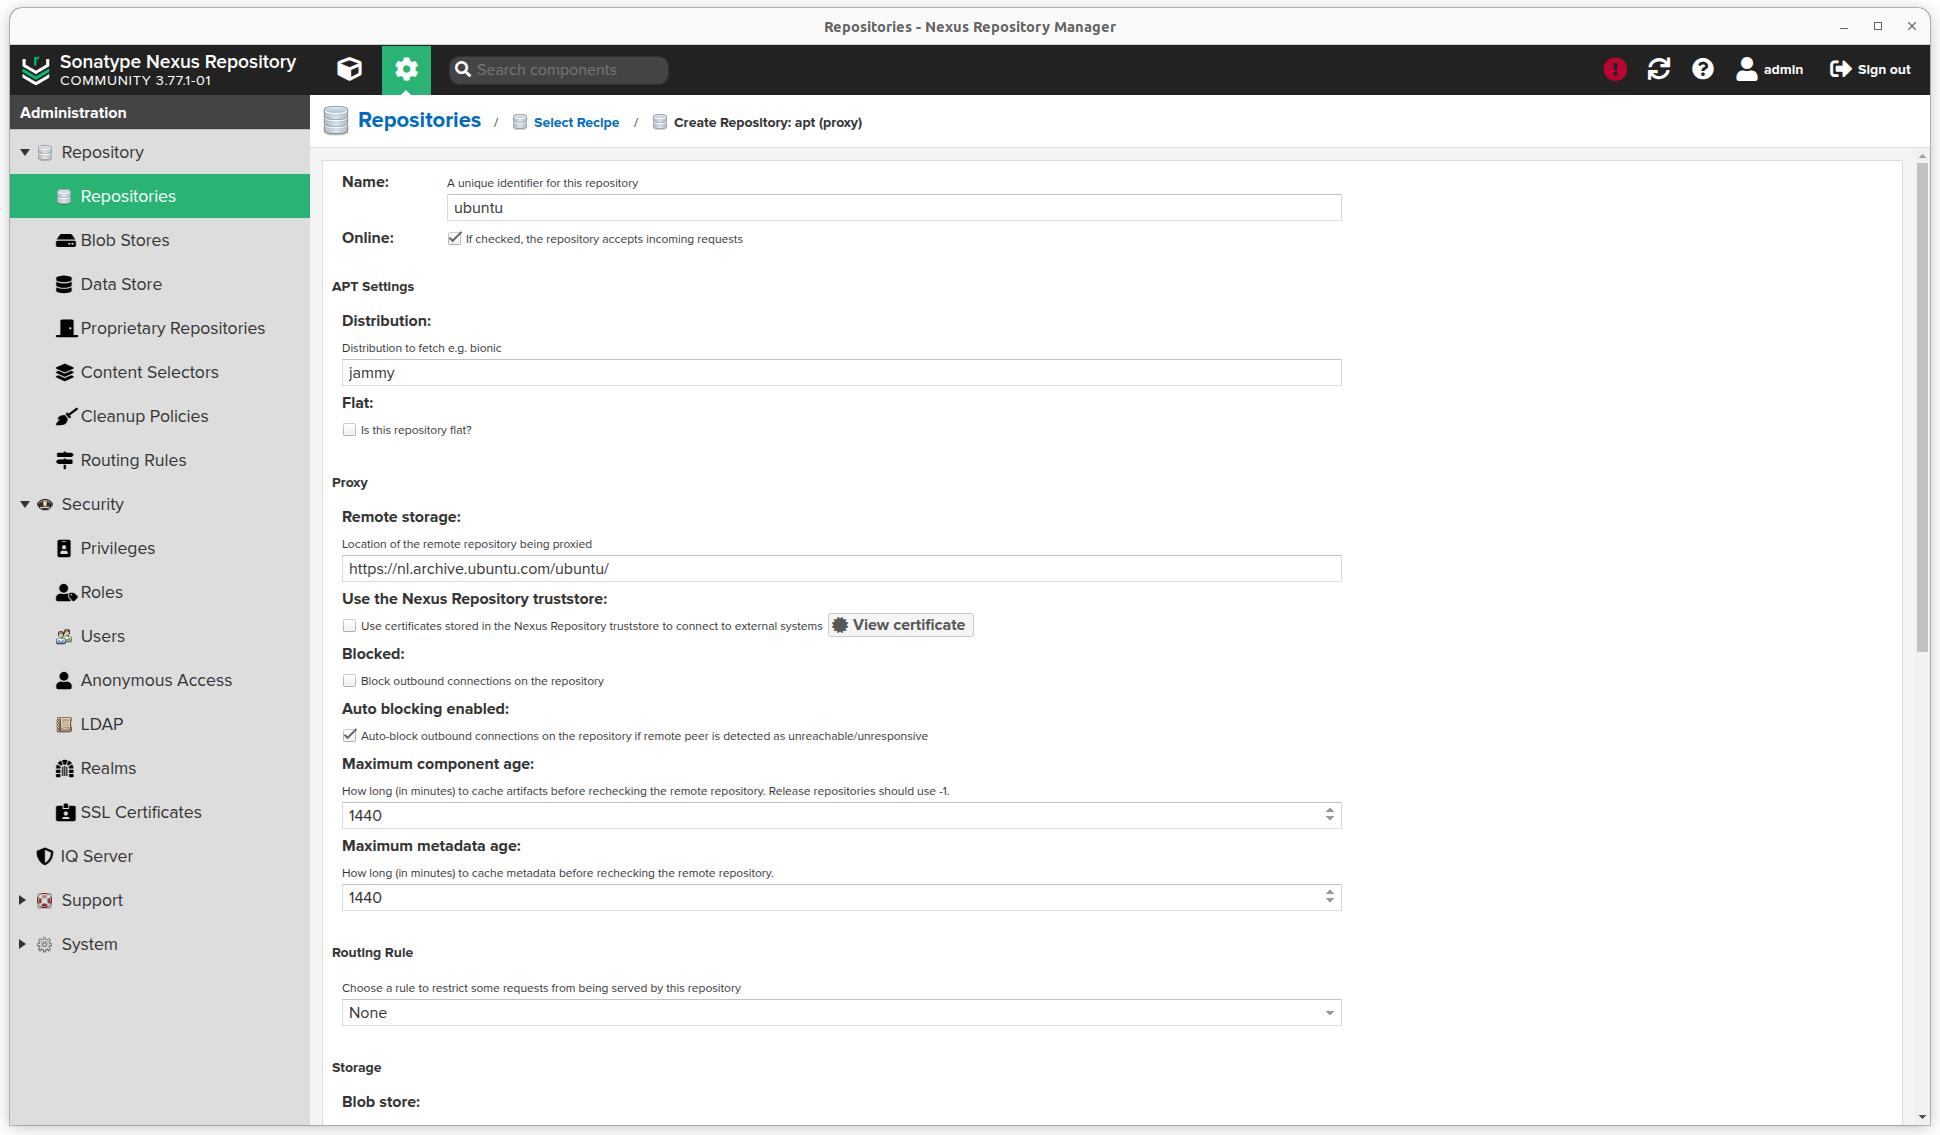
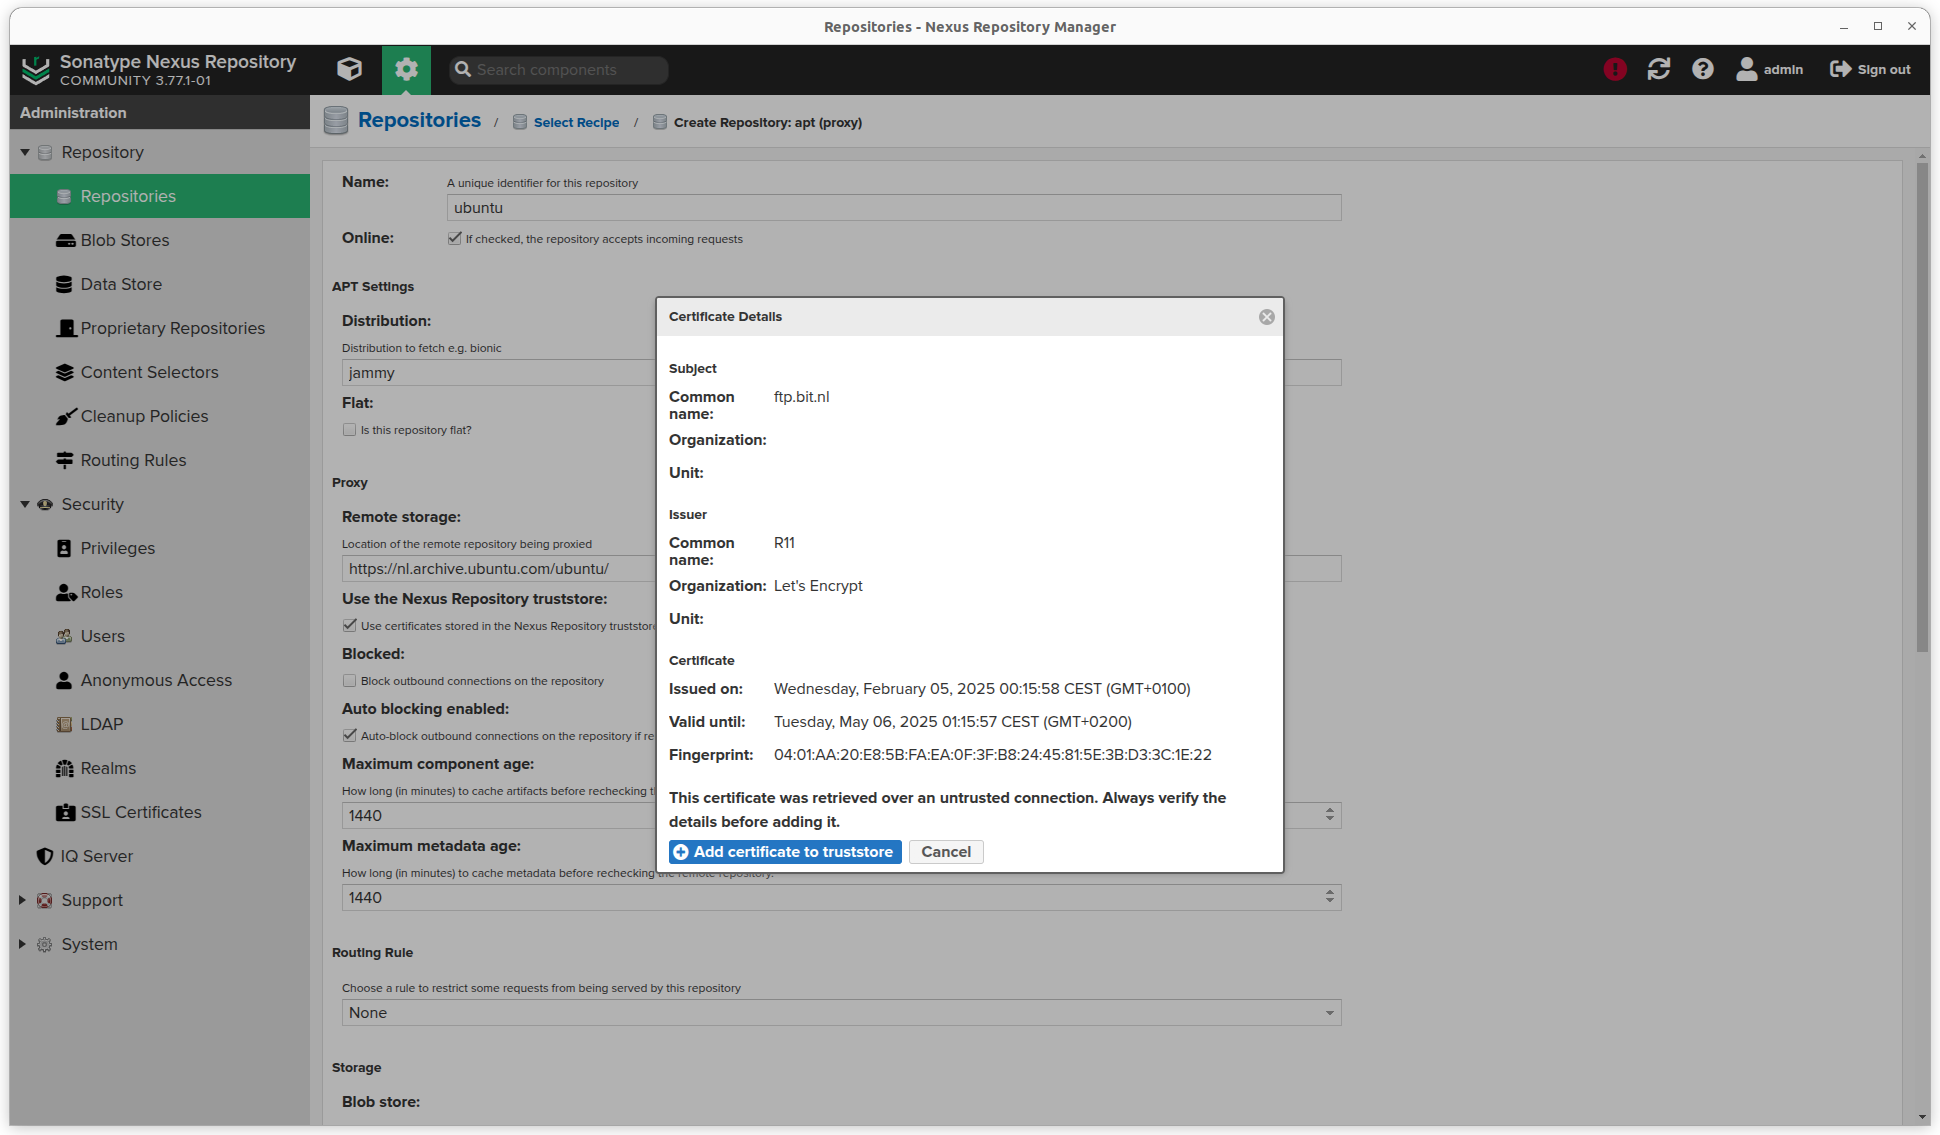
- As I entered an
httpsurl, I have to click the View certificate button and click Add certificate to truststore.
- Scroll down an select a Blob store and Cleanup policy
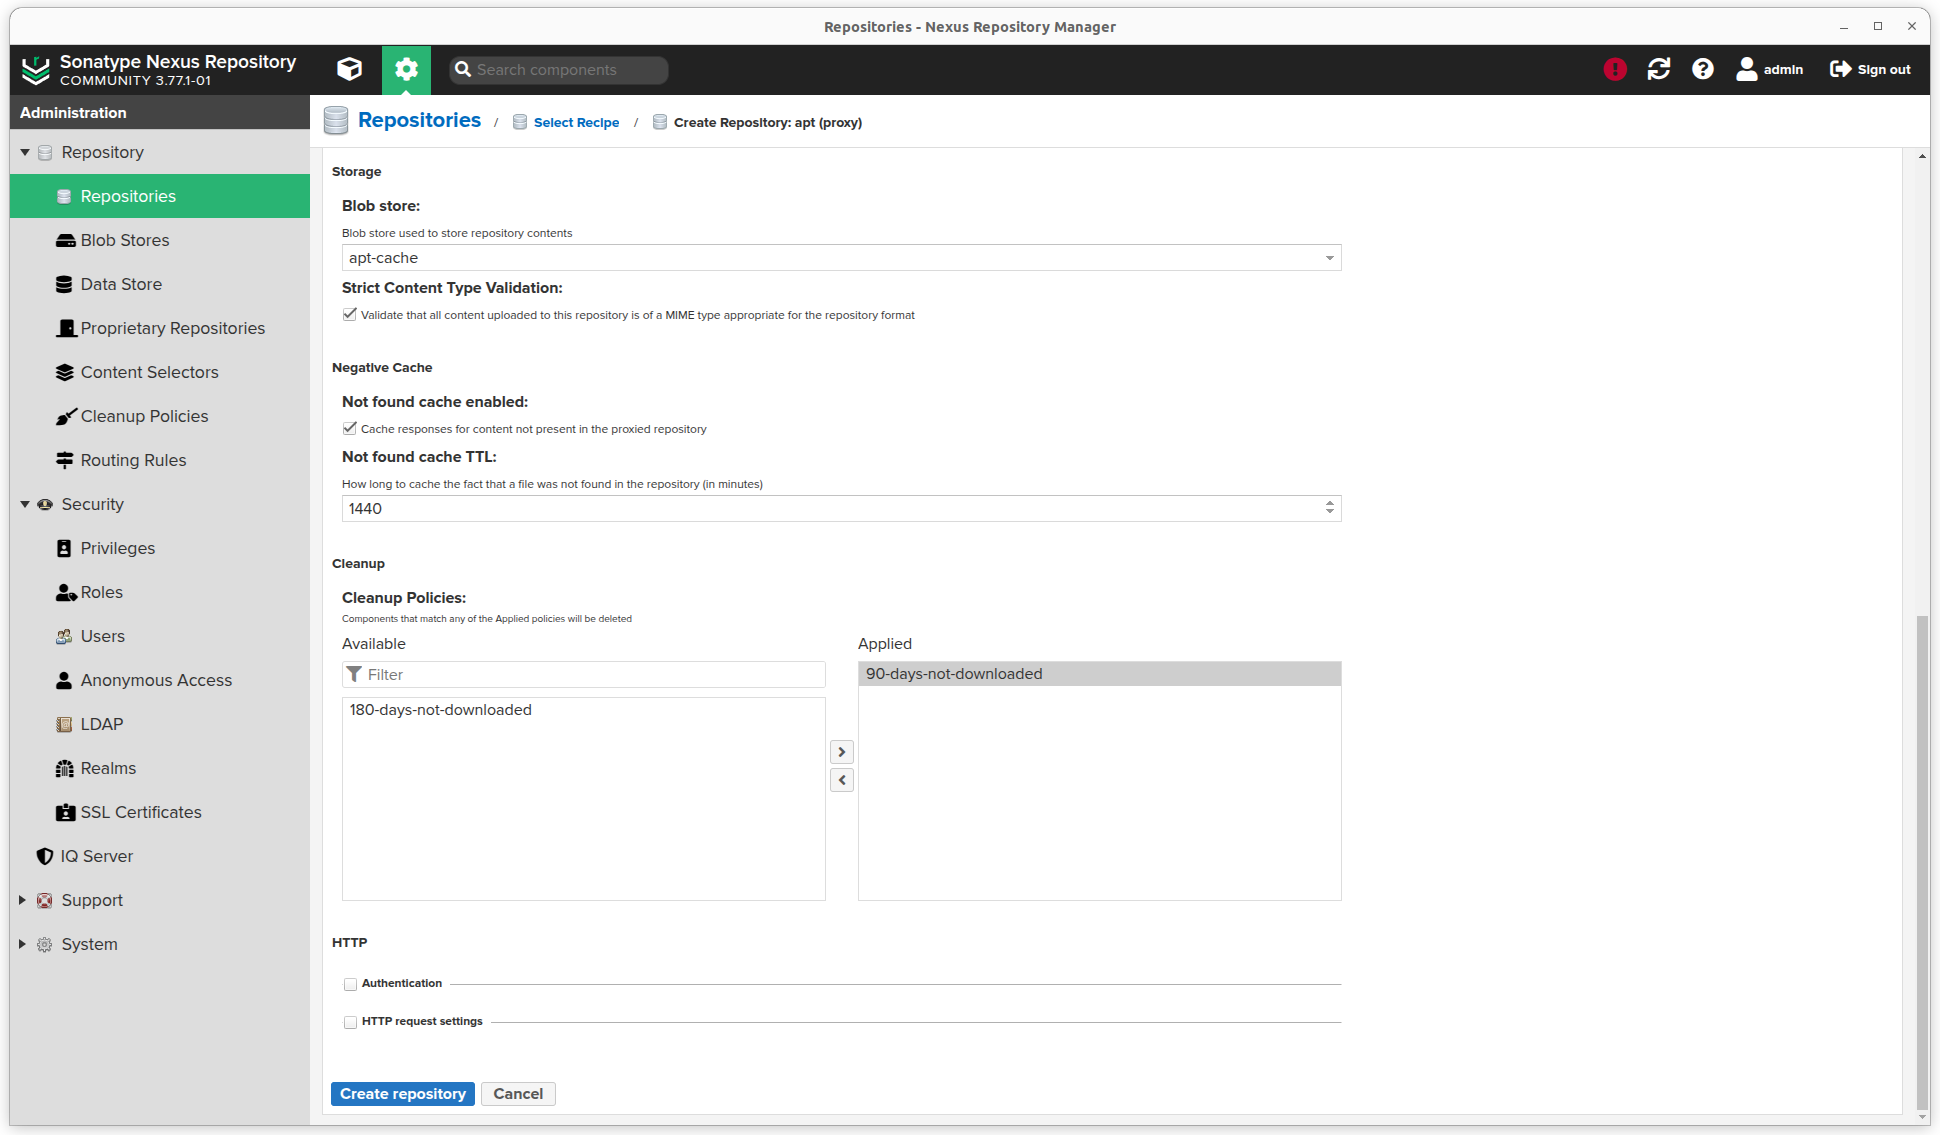
- Click the Create repository button.
- In the overview click the copy button to get the url to the repository.
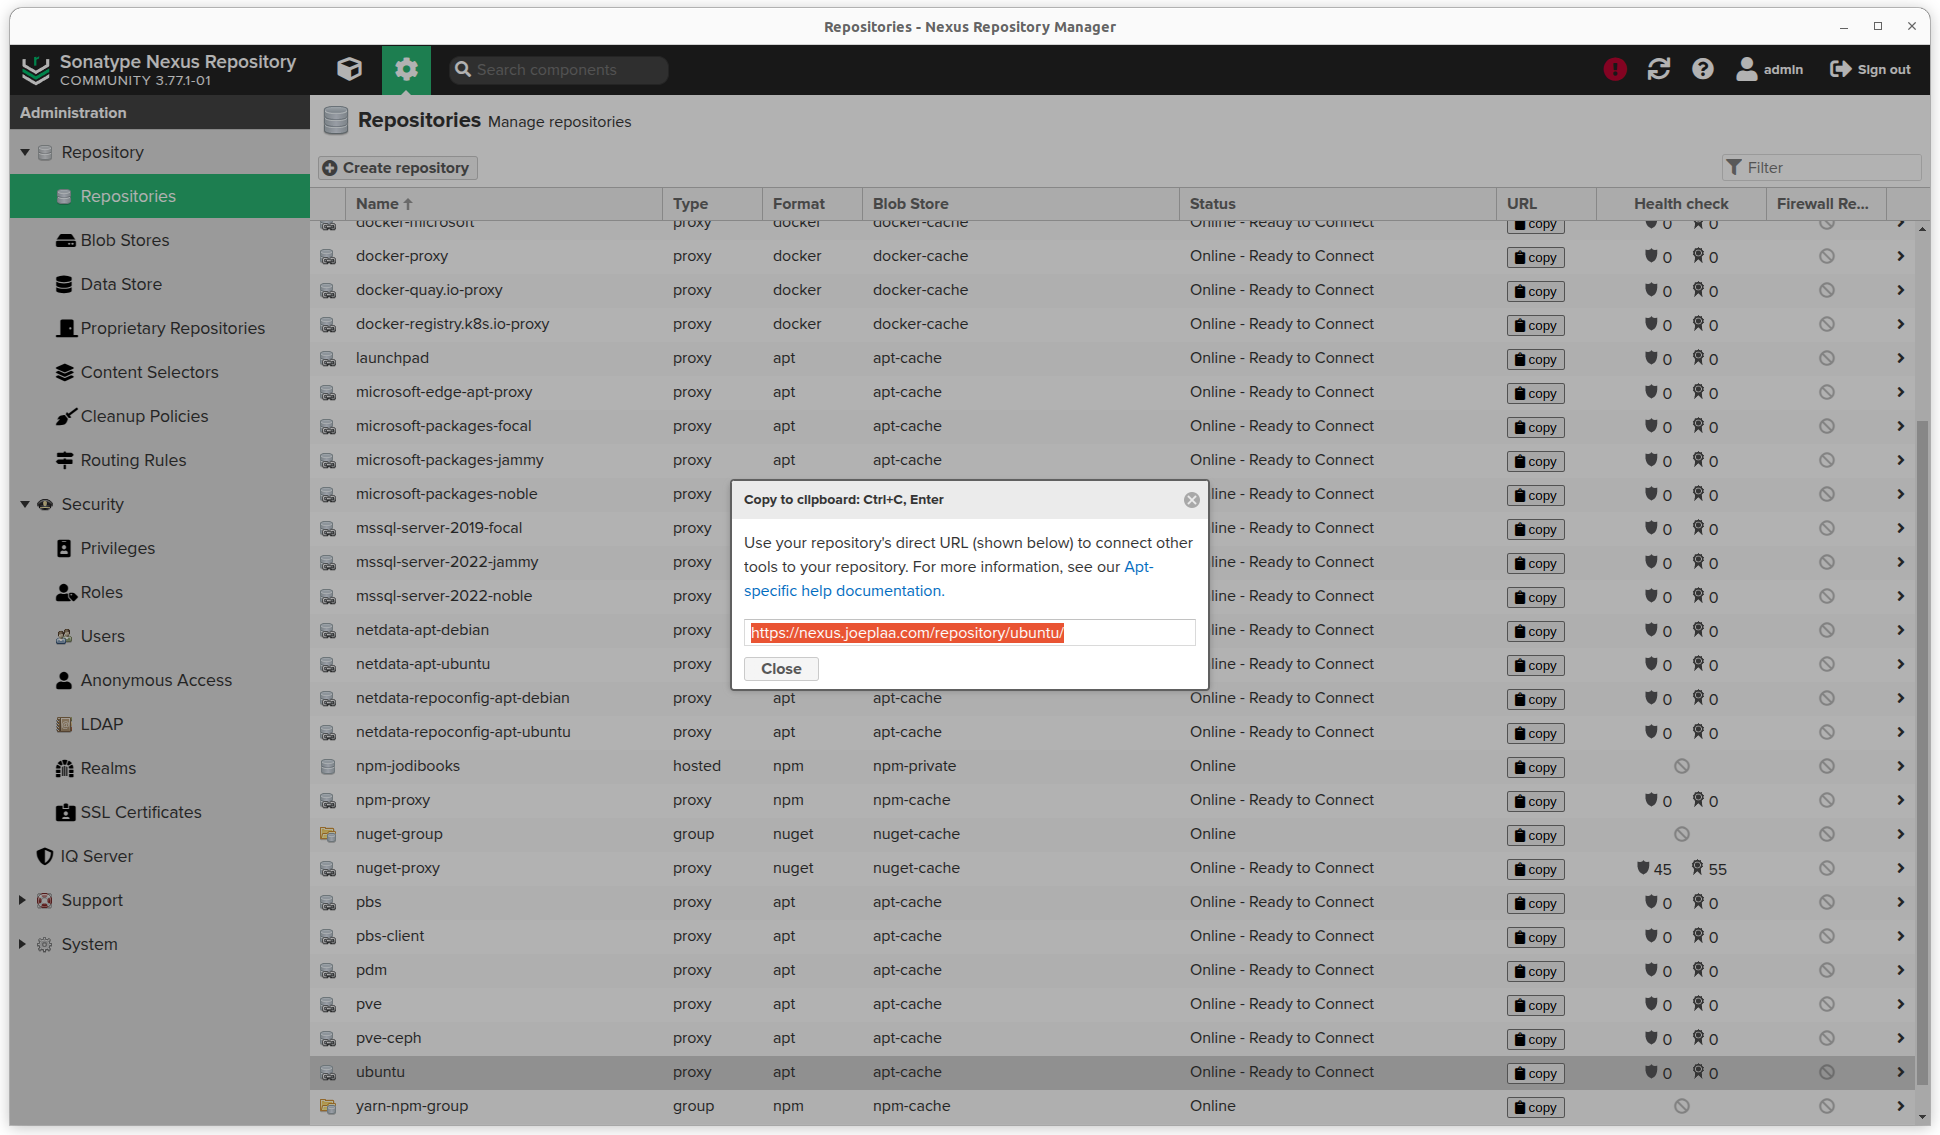
- Use this address when installing Ubuntu or update
/etc/apt/sources.listor/etc/apt/sources.list.d/ubuntu.sourcesin 24.04.
joep@PCJOEP:~$ sudo apt update
Hit:1 https://nvidia.github.io/libnvidia-container/stable/deb/amd64  InRelease
Get:2 https://esm.ubuntu.com/apps/ubuntu jammy-apps-security InRelease [7.565 B]
Get:3 https://esm.ubuntu.com/apps/ubuntu jammy-apps-updates InRelease [7.456 B]
Get:4 https://esm.ubuntu.com/infra/ubuntu jammy-infra-security InRelease [7.450 B]
Get:5 https://esm.ubuntu.com/infra/ubuntu jammy-infra-updates InRelease [7.449 B]
Hit:6 https://nexus20.joeplaa.com/repository/ubuntu jammy InRelease
Hit:7 https://nexus20.joeplaa.com/repository/ubuntu jammy-updates InRelease
Hit:8 https://nexus20.joeplaa.com/repository/ubuntu jammy-backports InRelease
Hit:9 https://nexus20.joeplaa.com/repository/ubuntu jammy-security InRelease
Hit:10 https://nexus20.joeplaa.com/repository/launchpad/ansible/ansible/ubuntu jammy InRelease
Hit:11 https://nexus20.joeplaa.com/repository/docker-apt jammy InRelease
Hit:12 https://nexus20.joeplaa.com/repository/launchpad/kdenlive/kdenlive-stable/ubuntu jammy InRelease
Hit:13 https://nexus20.joeplaa.com/repository/microsoft-edge-apt-proxy stable InRelease
Hit:14 https://nexus20.joeplaa.com/repository/pbs-client bookworm InRelease
Hit:15 https://nexus20.joeplaa.com/repository/launchpad/remmina-ppa-team/remmina-next/ubuntu jammy InRelease
Fetched 29,9 kB in 1s (33,2 kB/s)
Reading package lists... Done
Building dependency tree... Done
Reading state information... Done
All packages are up to date.
Docker group
Next on my list was a cache for docker images. The process for creating a Docker proxy is virtually the same as for Apt above, but we first need to create a Docker group repository.
- Click the settings sprocket next to the search bar and go to "Repository".
- Click Repositories
- Click the Create repository button. A long list of options is available.
- We want "docker (group)"
- Enter a name, I called it
docker-group. Yes, I'm very creative. - Select Allow anonymous docker pull
- Select Enable Docker V1 API
- Select Strict Content Type Validation
- Click the Create repository button.
Docker proxy
- Click the settings sprocket next to the search bar and go to "Repository".
- Click Repositories
- Click the Create repository button. A long list of options is available.
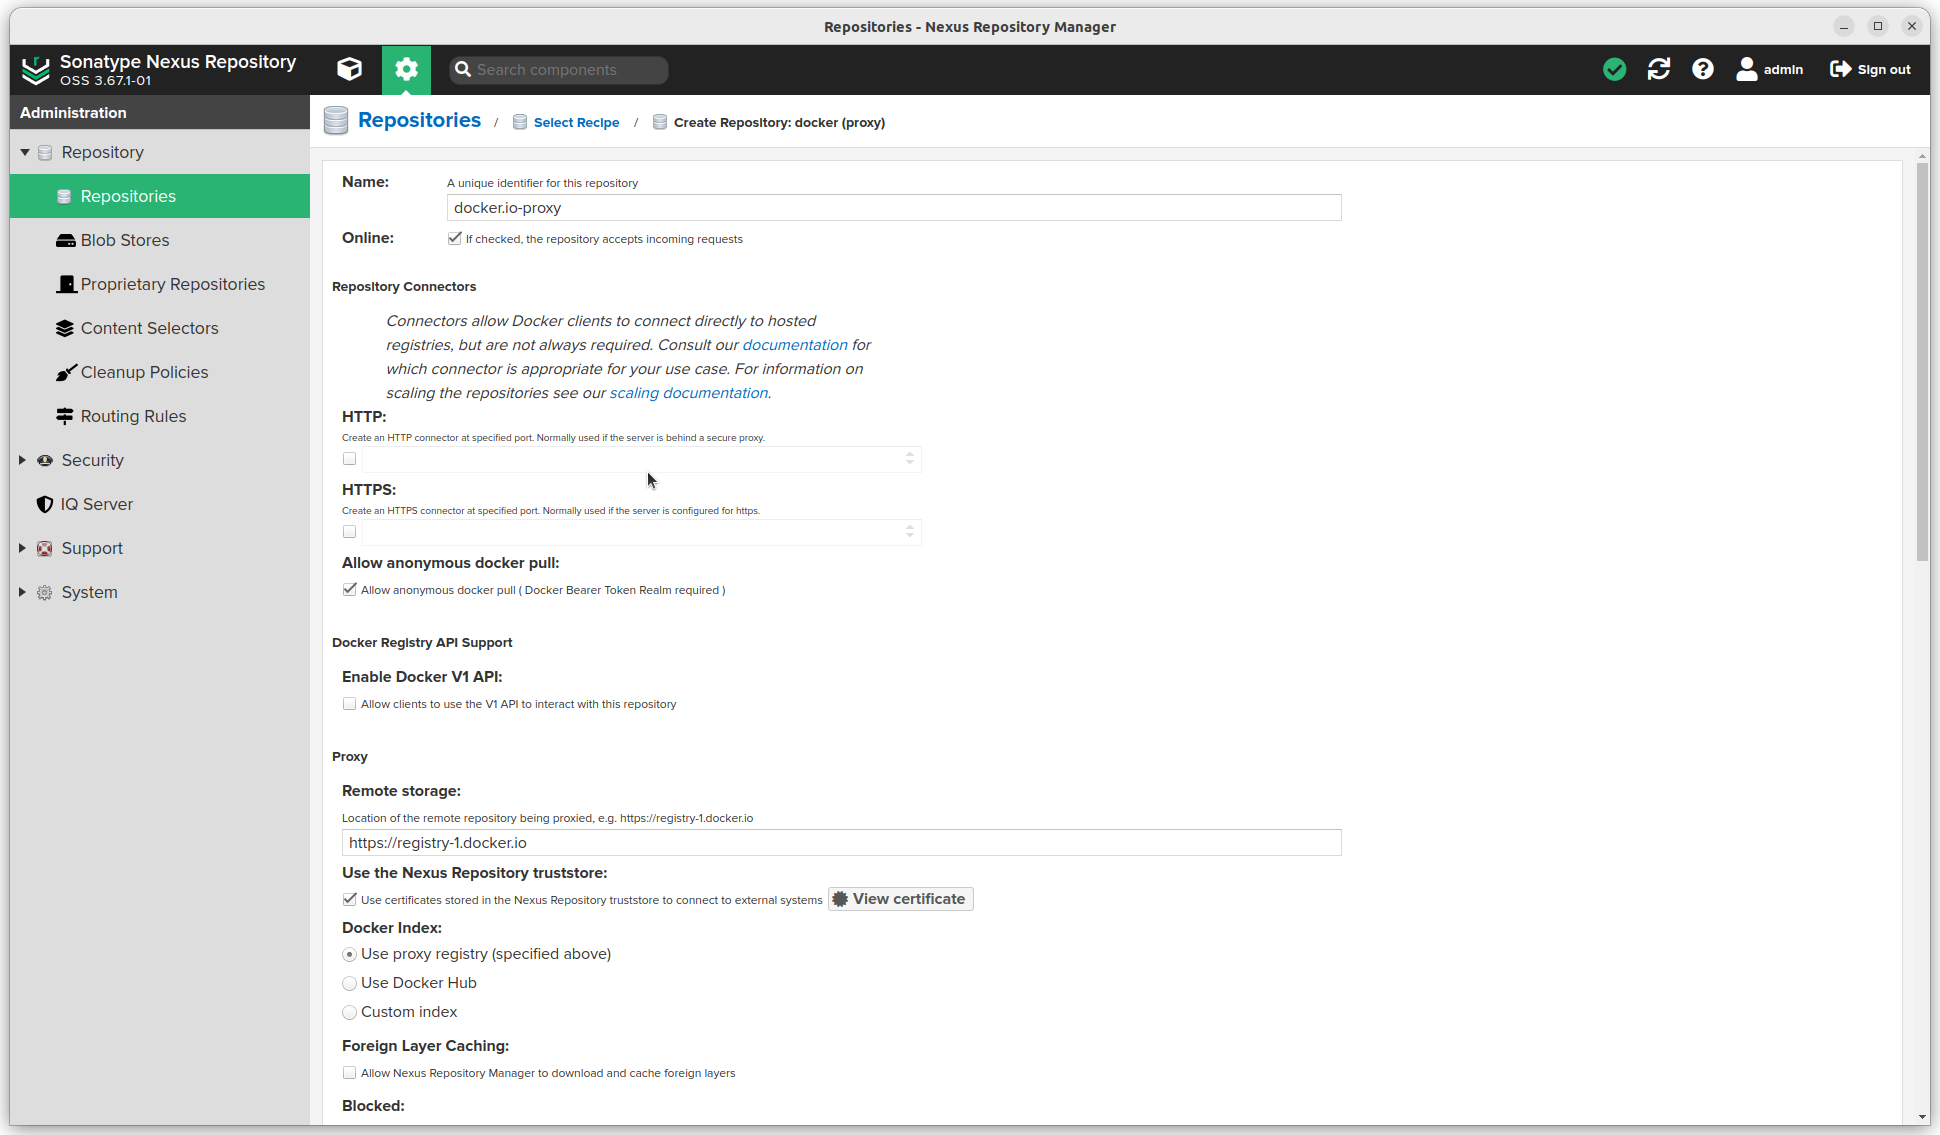
- We want "docker (proxy)"
- Enter a name (this will be used in the url). I try to use the domain of the Remote storage url (see below)
- Check Allow anonymous docker pull
- The Remote storage url. In this example I use
https://registry-1.docker.io - Select Use the Nexus Repository truststore. As I entered an
httpsurl, I have to click the View certificate button and click Add certificate to truststore - Select "Use proxy registry" as Docker index
- Also check Auto blocking enabled
- Select a Blob store
- Select Strict Content Type Validation and Not found cache enabled.
- Add a Cleanup policy
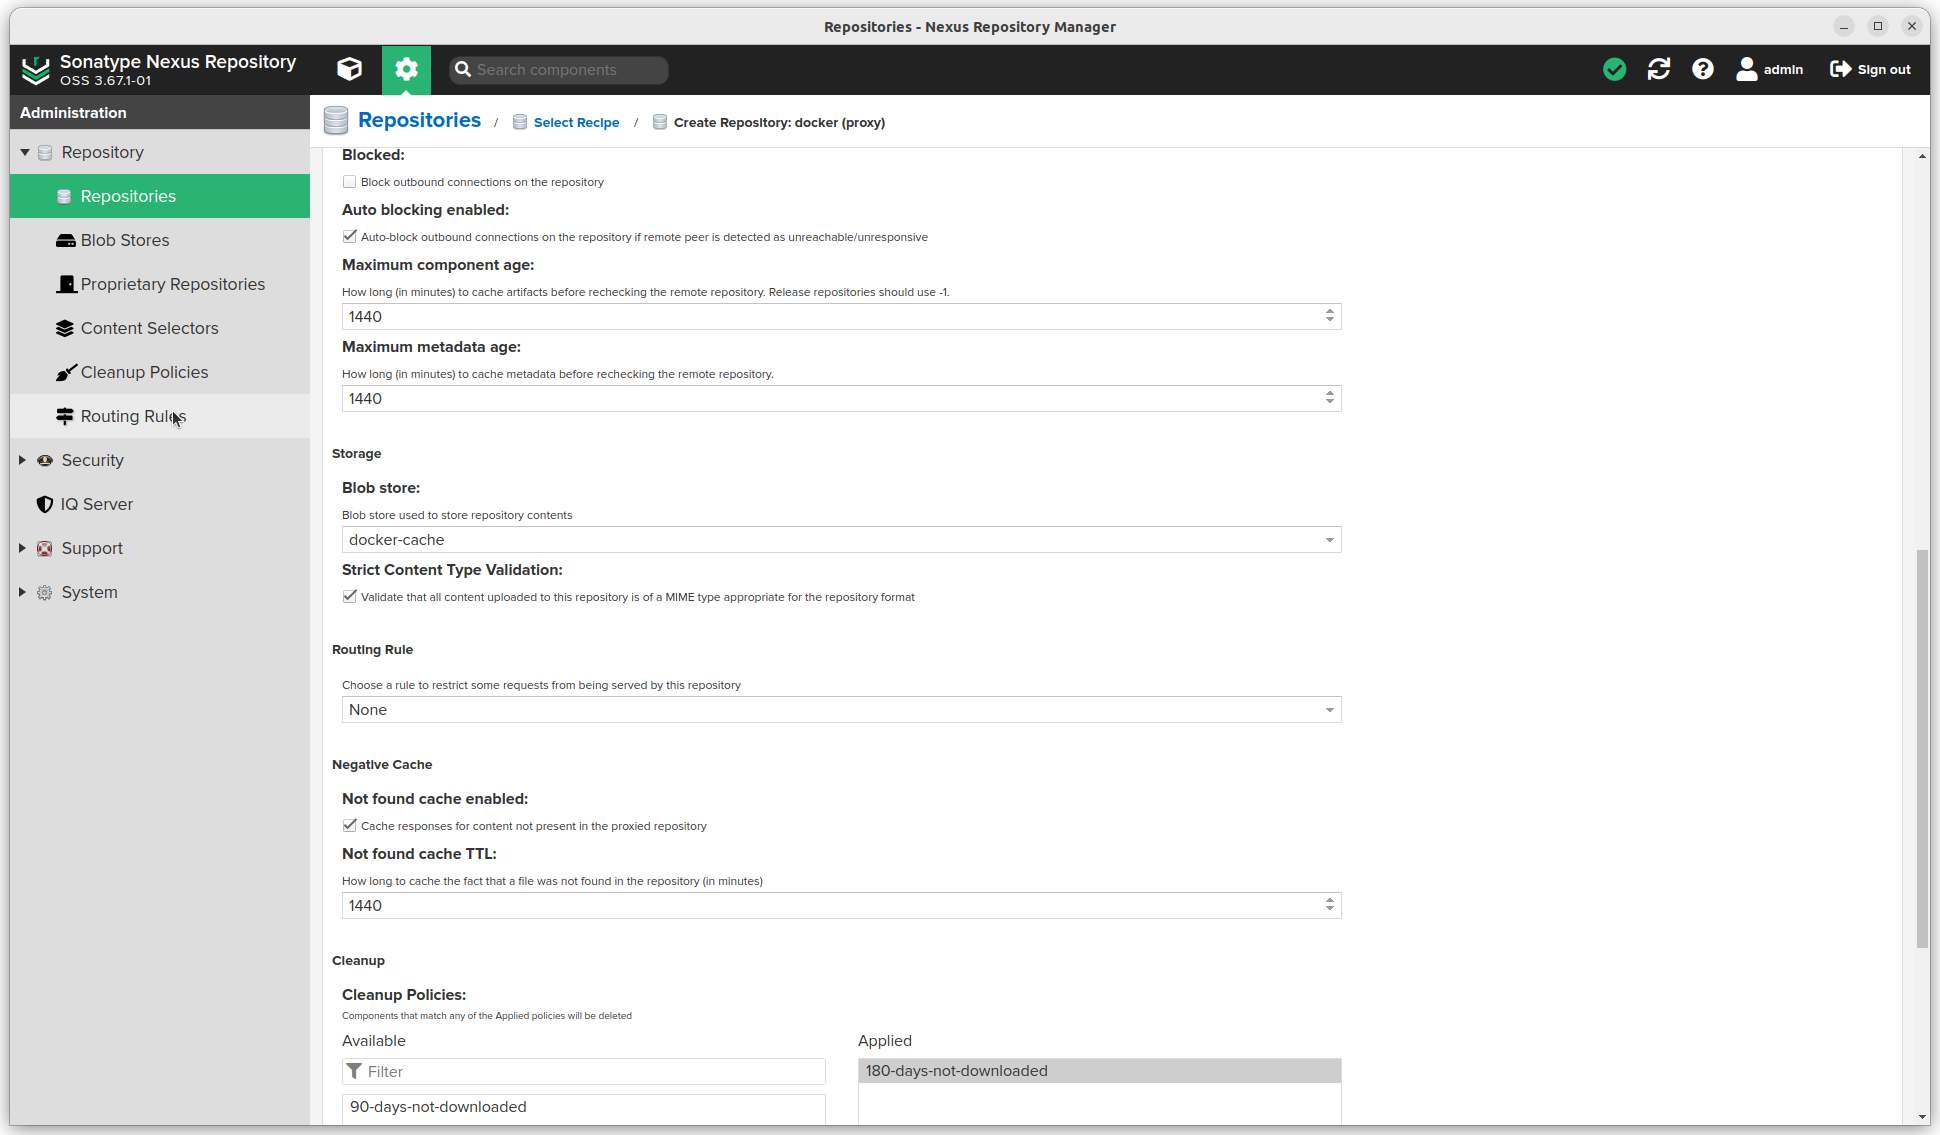
- Click the Create repository button.
- Add the repository to the docker group. Open the group and add it under Member repositories
- Update all
docker-composefiles or regular docker commands to use images fromnexus.joeplaa.com. For example:nexus.joeplaa.com/nginxornexus.joeplaa.com/guacamole/guacamole.
I added multiple docker repositories this way and added them all to my docker group. Nexus will figure out which one to use, which is super convenient.

Docker hosted
If you create custom images and want to host them locally, you can create a hosted Docker repo.
- Click the settings sprocket next to the search bar and go to "Repository".
- Click Repositories
- Click the Create repository button. A long list of options is available.
- We want "docker (hosted)"
- Enter a name (this will be used in the url).
- Check Allow anonymous docker pull
- Select a Blob store
- Select Strict Content Type Validation
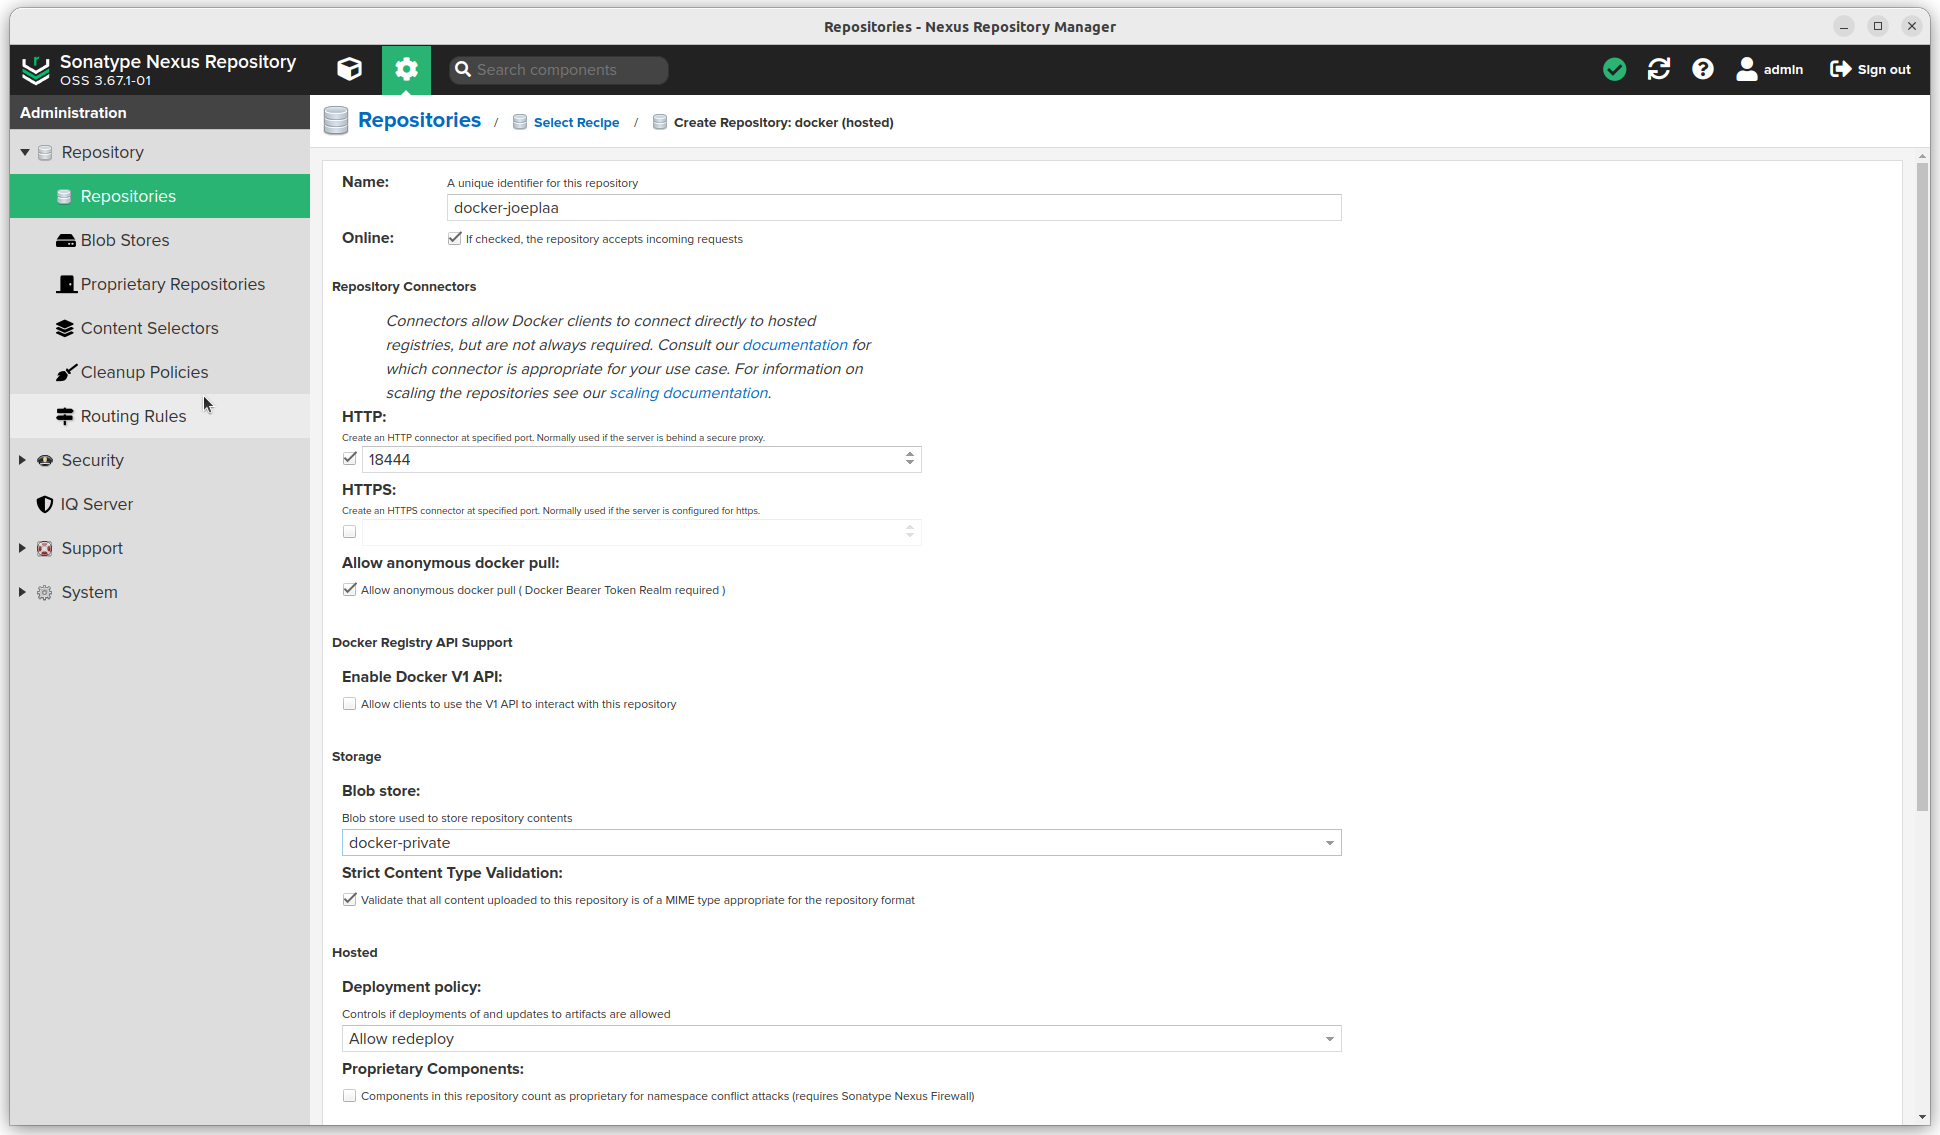
- Choose "Allow redeploy" as Deployment policy
- Do not add a Cleanup policy
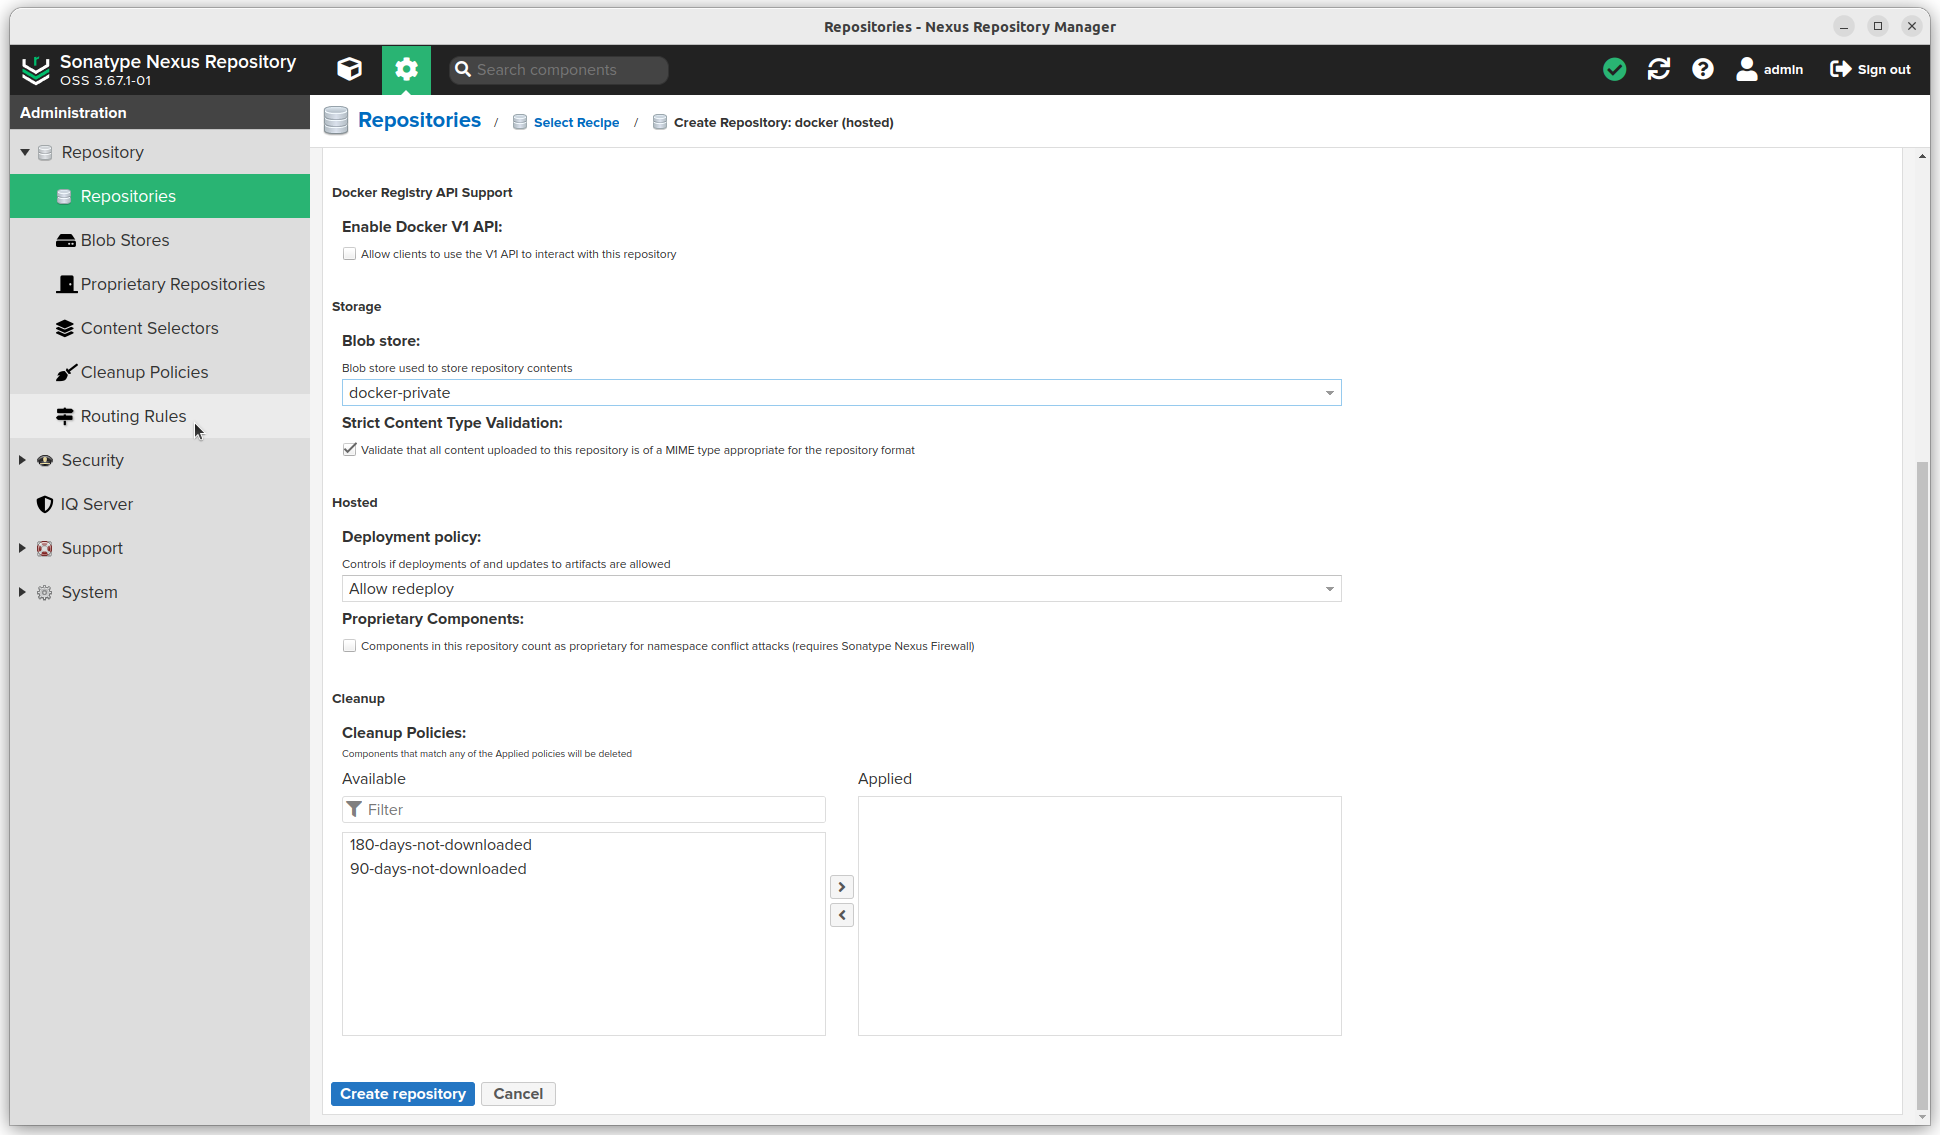
- Click the Create repository button.
- Add the repository to the docker group. Open the group and add it under Member repositories.
- Update all
docker-composefiles or regular docker commands to use images fromnexus.joeplaa.com. For example:nexus.joeplaa.com/joeplaa/nginx. - In your Nginx config remove the
~ ^/(v1|v2)/location block and add these two:
    location ~ ^/(v1|v2)/[^/]+/?[^/]+/blobs/ {
        if ($request_method ~* (POST|PUT|DELETE|PATCH|HEAD) ) {
            rewrite ^/(.*)$ /repository/docker-joeplaa/$1 last;
        }
        rewrite ^/(.*)$ /repository/docker-group/$1 last;
    }

    location ~ ^/(v1|v2)/ {
        if ($request_method ~* (POST|PUT|DELETE|PATCH) ) {
            rewrite ^/(.*)$ /repository/docker-joeplaa/$1 last;
        }
        rewrite ^/(.*)$ /repository/docker-group/$1 last;
    }
Nuget proxy
This is similar to the docker proxies.
- Create a group
- Create proxy (or proxies)
- Add proxies to group
- Copy group url
- In your IDE / project enter the url to the Nuget group.
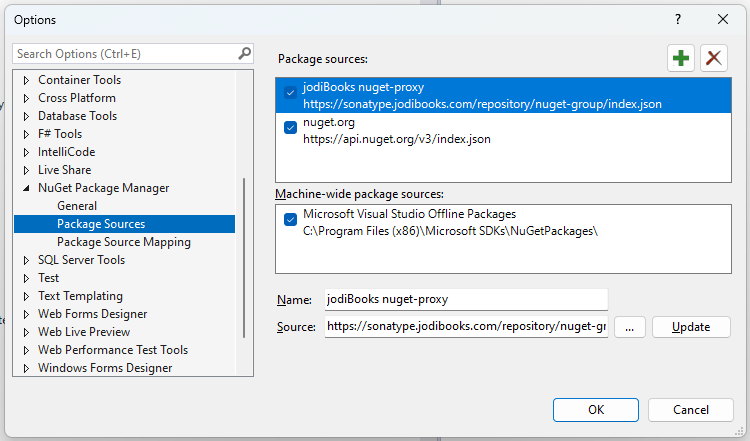
- And/or update
NuGet.Configin the main folder of the application repository.
<?xml version="1.0" encoding="utf-8"?>
<configuration>
    <config>
        <add key="repositoryPath" value="$\..\packages" />
    </config>
    <packageSources>
        <add key="jodiBooks nuget-proxy" value="https://sonatype.jodibooks.com/repository/nuget-group/index.json" />
        <!-- <add key="NuGet official package source" value="https://api.nuget.org/v3/index.json" /> -->
    </packageSources>
</configuration>
Npm + Yarn proxy
This is similar to the docker proxies.
- Create a group:
yarn-npm-group - Create npm proxies (https://registry.npmjs.org & https://registry.yarnpkg.com)
- Add proxies to the group
- Copy group url
- In your
yarnprojects addnpmRegistryServer: "https://nexus.joeplaa.com/repository/yarn-npm-group/"to your.yarnrc.yml, removeyarn.lockand runyarn install. This will recreateyarn.lockwith the Nexus repository instead of the default npm one.
Npm hosted
If you create custom npm packages and want to host them locally, you can create a hosted npm repo.
- Click the settings sprocket next to the search bar and go to "Repository".
- Click Repositories
- Click the Create repository button. A long list of options is available.
- We want "npm (hosted)"
- Enter a name (this will be used in the url).
- Select a Blob store
- Select Strict Content Type Validation
- Do not add a Cleanup policy
- Add the repository to the yarn-npm group. Open the group and add it under Member repositories.
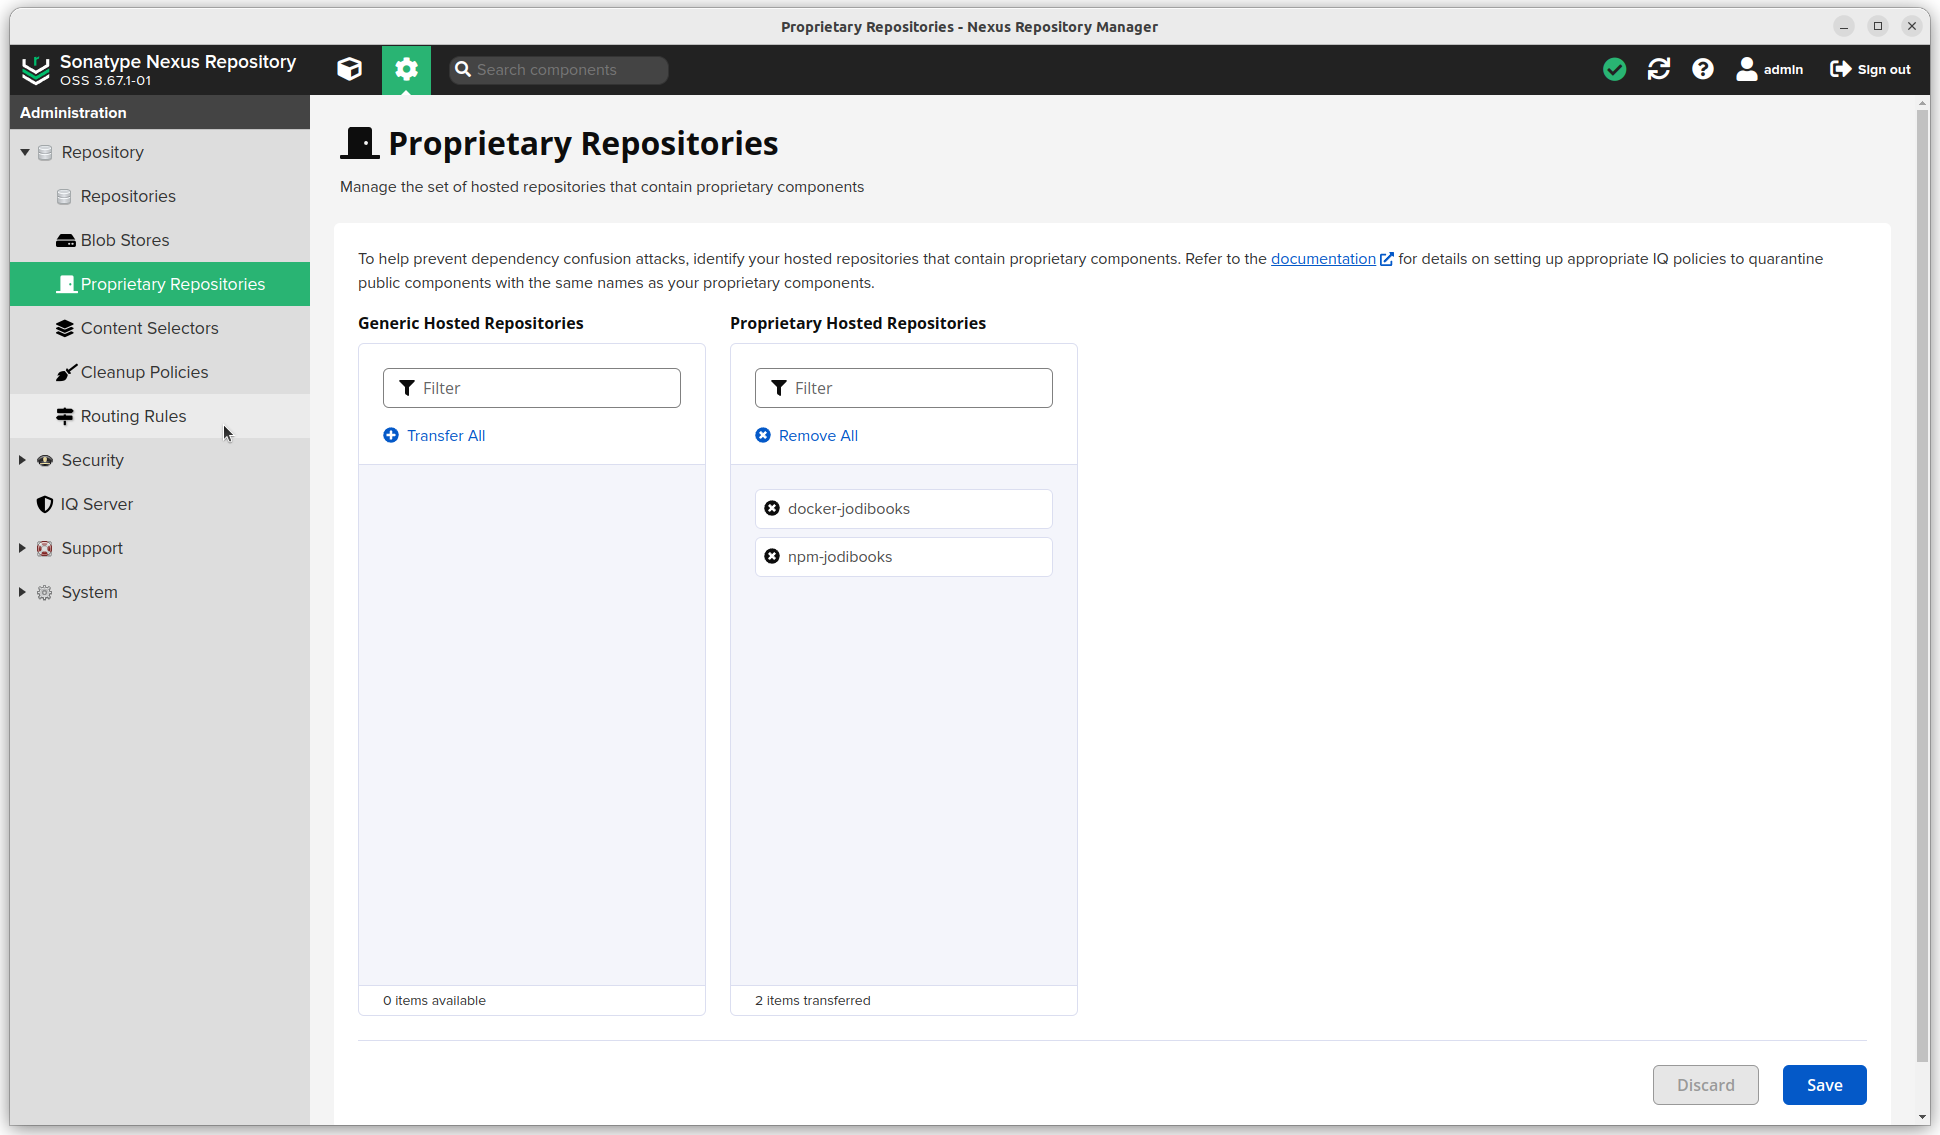
Proprietary Repositories
I haven't exposed Nexus to the internet, so this section is basically optional. However, better be prepared.
- Click the settings sprocket next to the search bar and go to "Repository".
- Click Proprietary Repositories
- Select the hosted docker and npm repositories.
Further configuration
Now that we have our repositories set up, we can start adding users and we need to schedule some maintenance.
Roles
- Click the settings sprocket next to the search bar and go to "Security".
- Click Roles
- Select the user we created in the beginning
- Add
nx-repository-view-docker-docker-jodibooks-*andnx-repository-view-npm-npm-jodibooks-*to the Applied Privileges - Add
nx-anonymousto the Applied Roles
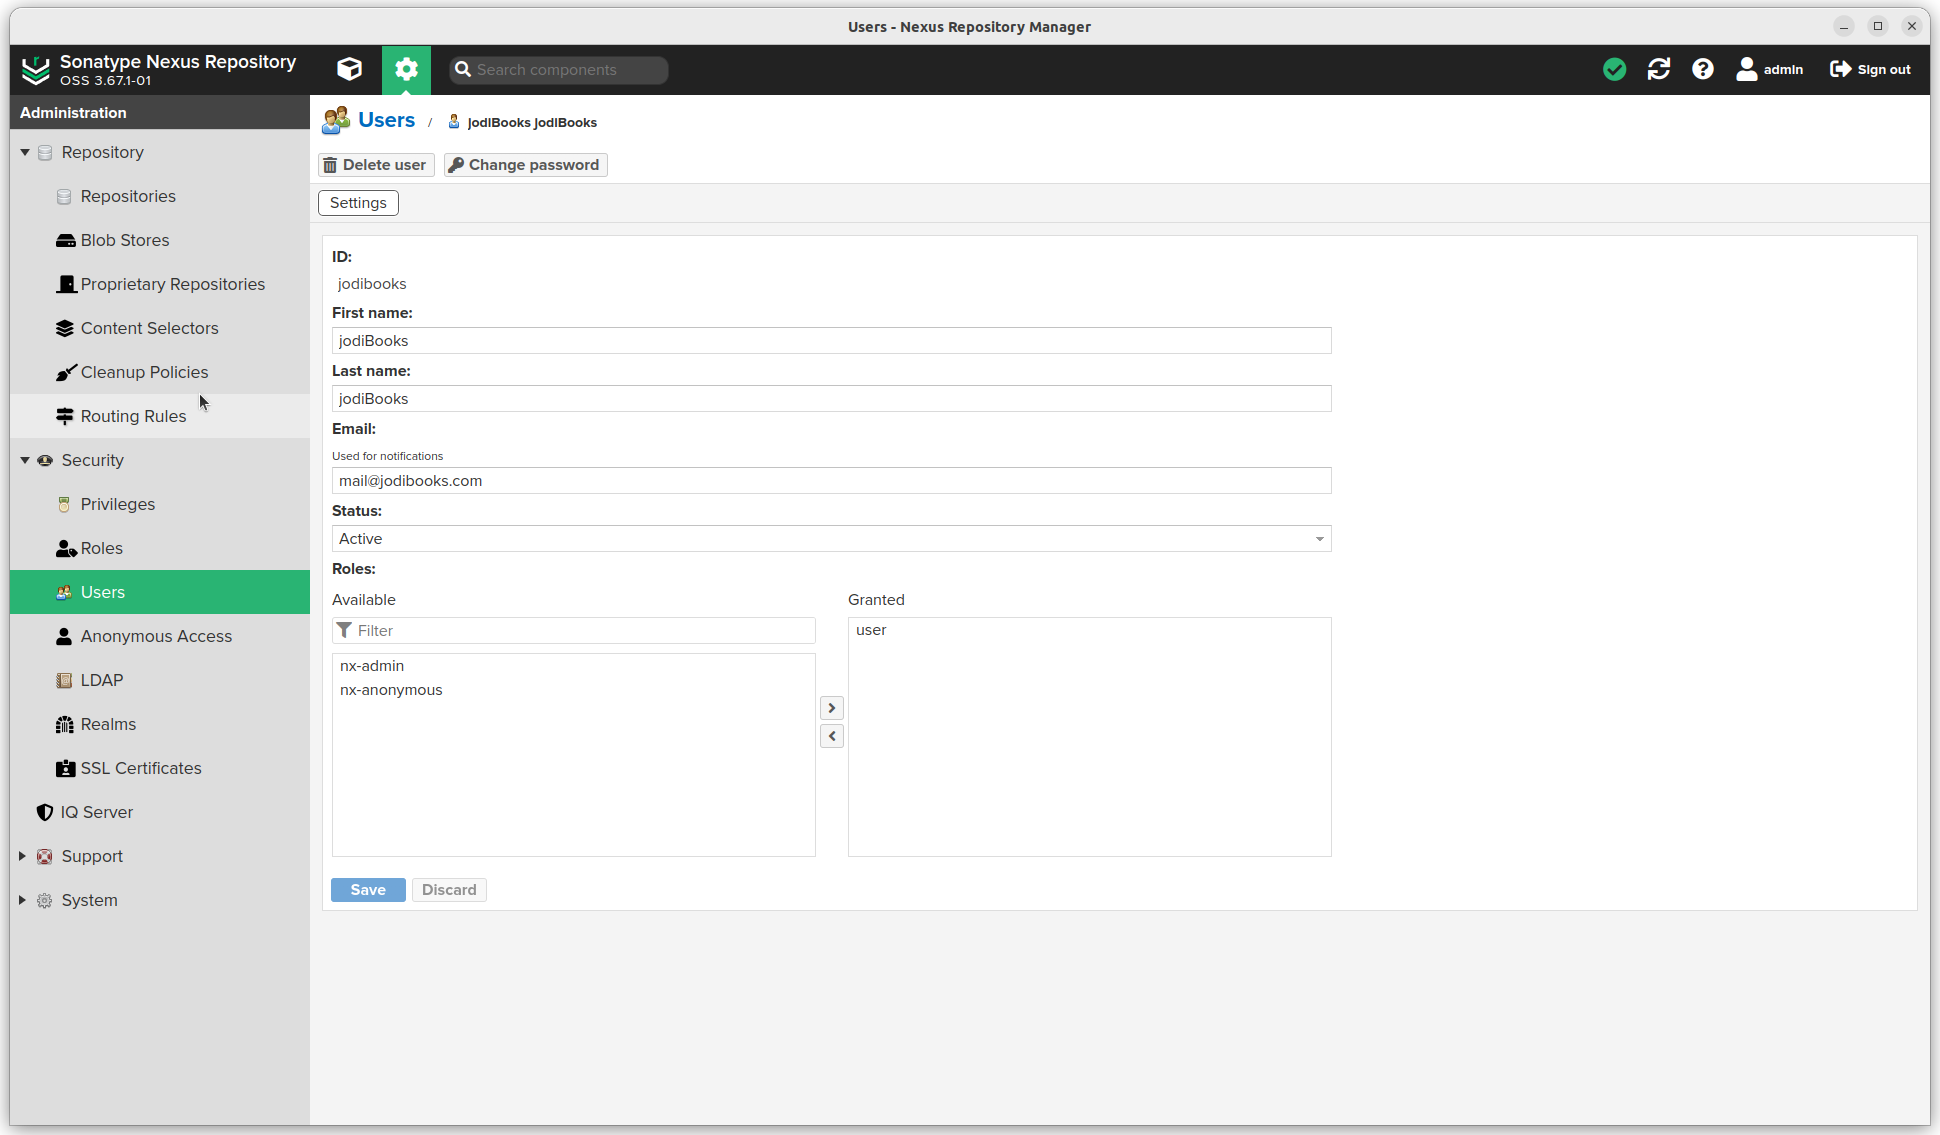
Users
- Click the settings sprocket next to the search bar and go to "Security".
- Click Users
- Create a user with role user
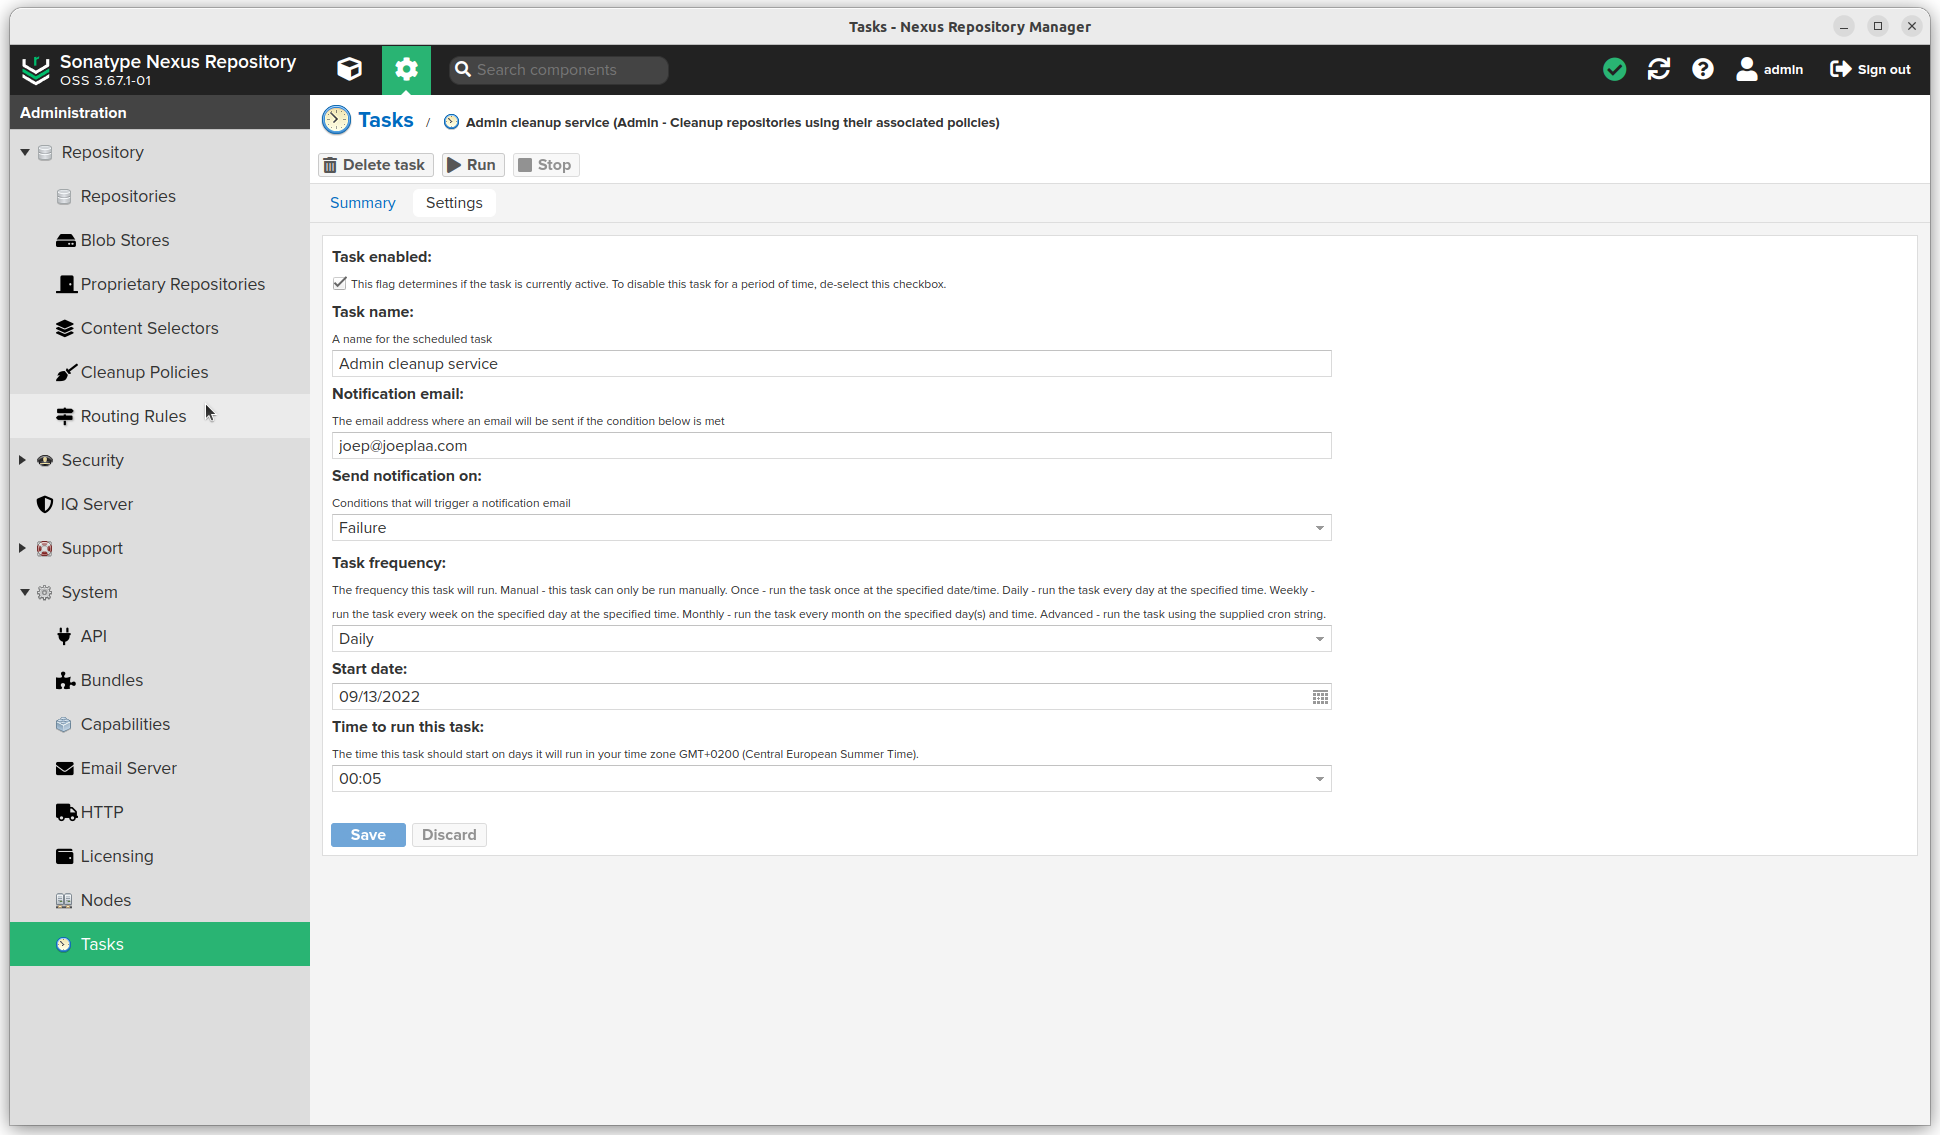
Tasks
- Click the settings sprocket next to the search bar and go to "System".
- Click Tasks
- Click Create task
- Actually trigger the cleanup policies: Admin - Cleanup repositories using their associated policies
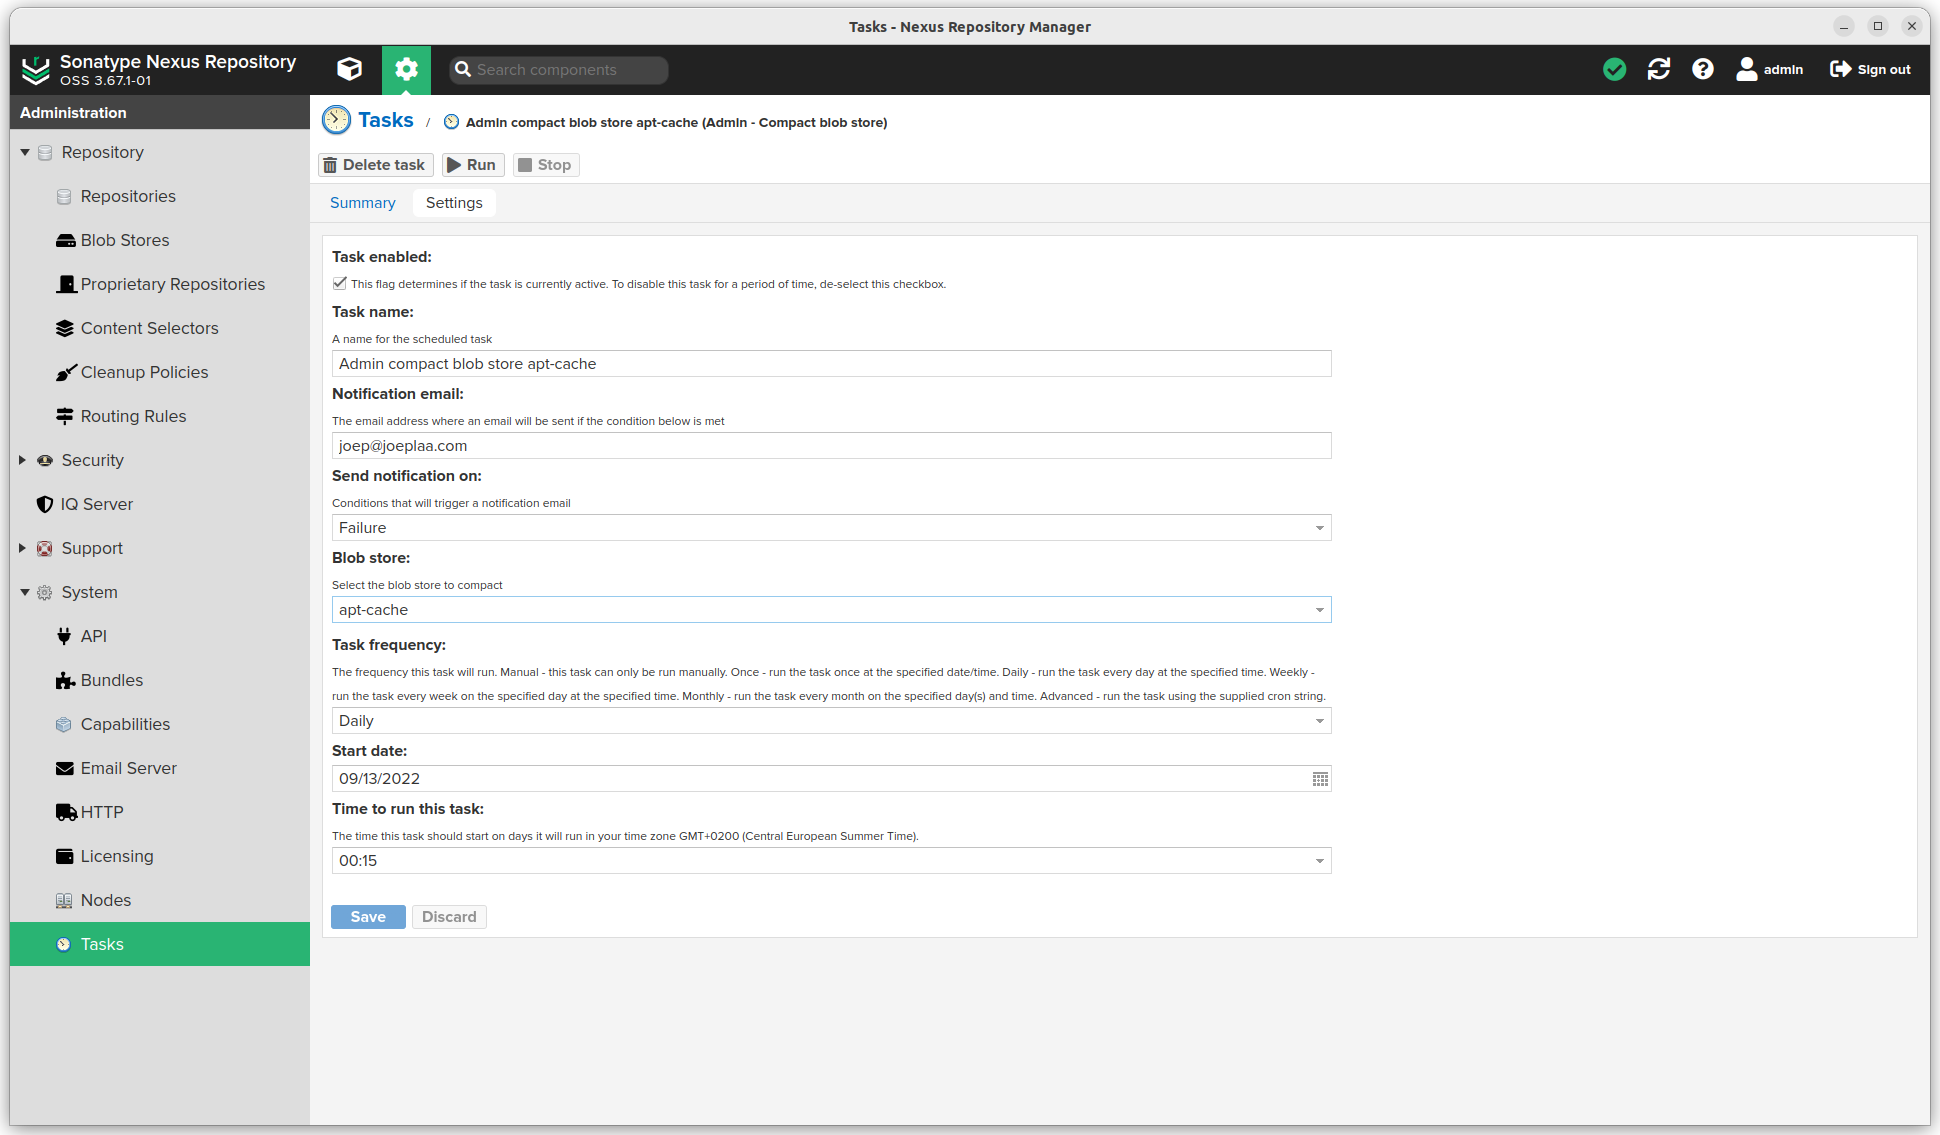
- Click Create task
- Compact the blob store: Admin - Compact blob store (repeat for each blob store)
- Click Create task
- Cleanup docker repos part 1: Docker - Delete incomplete uploads
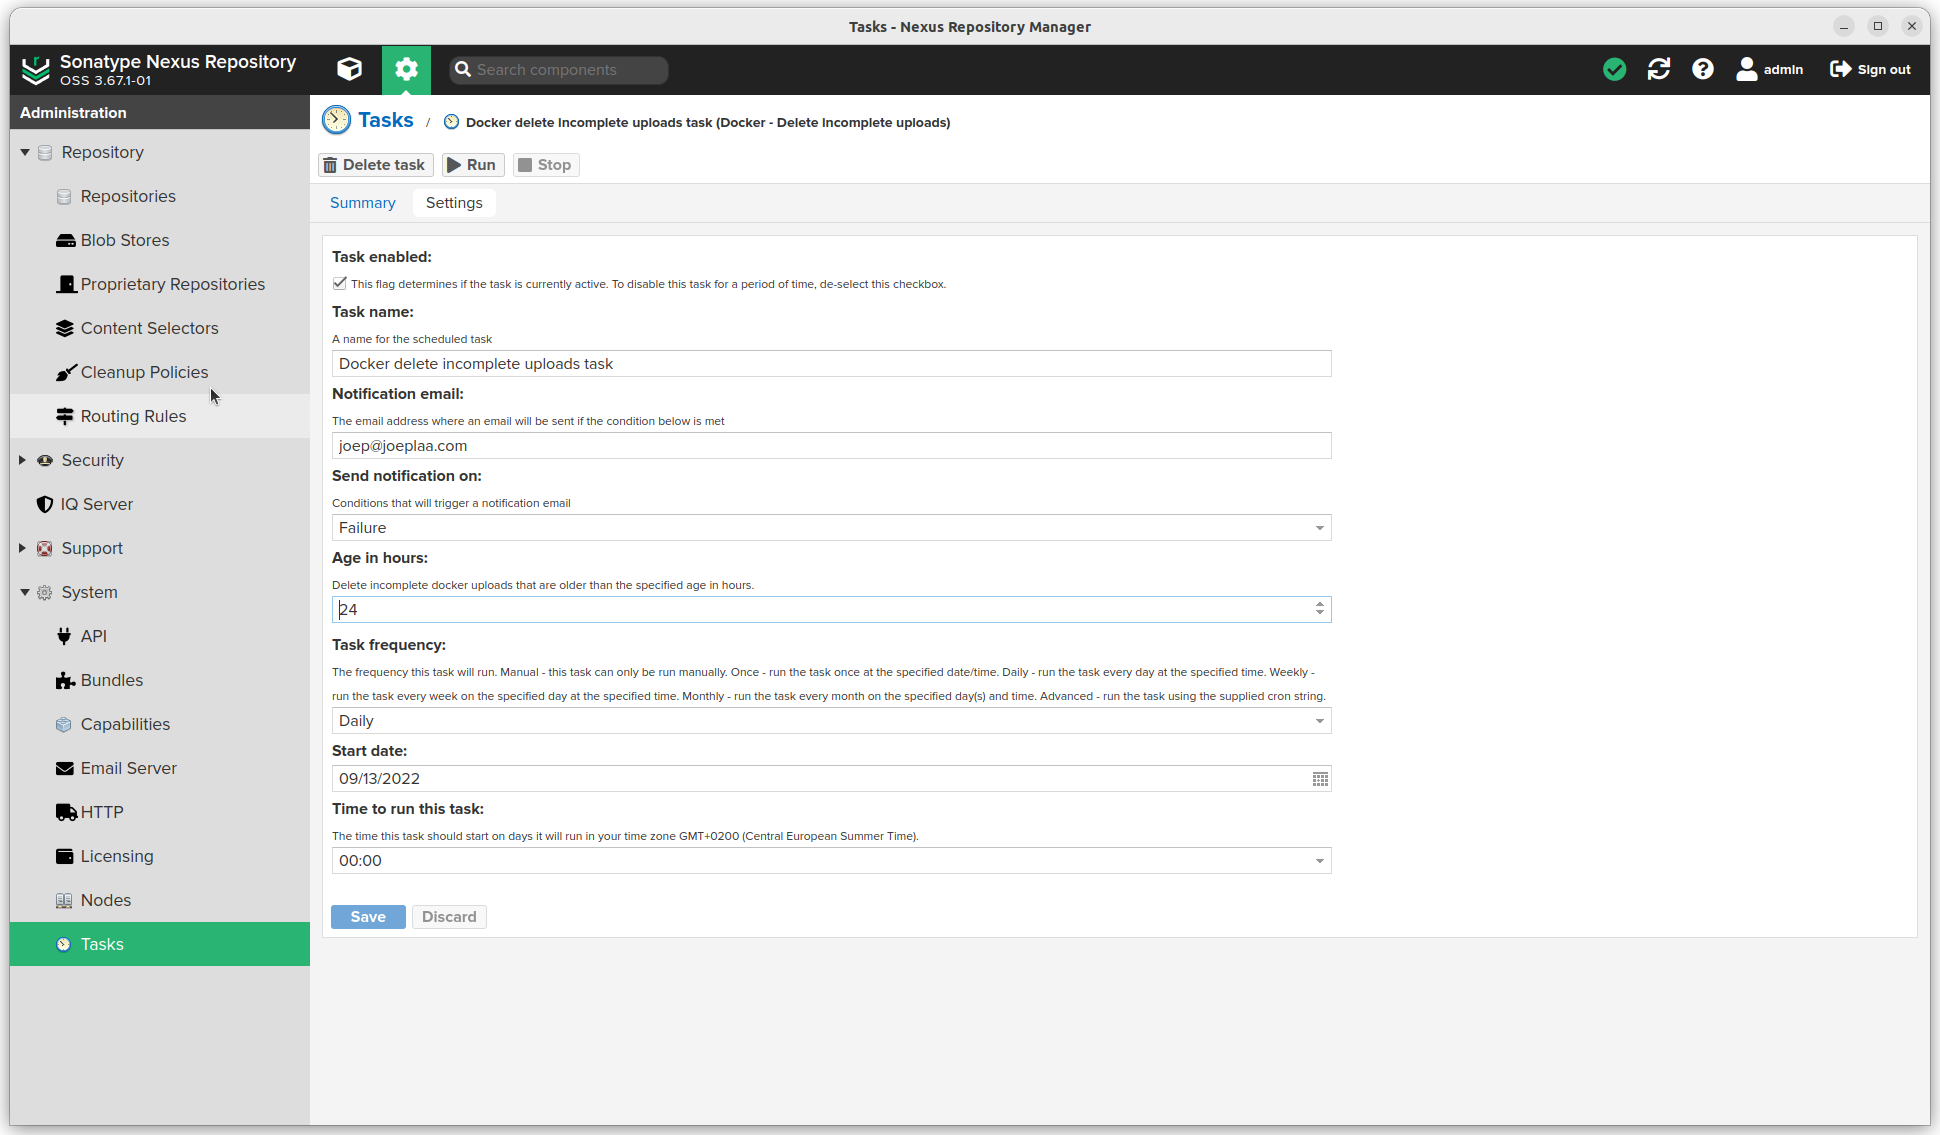
- Click Create task
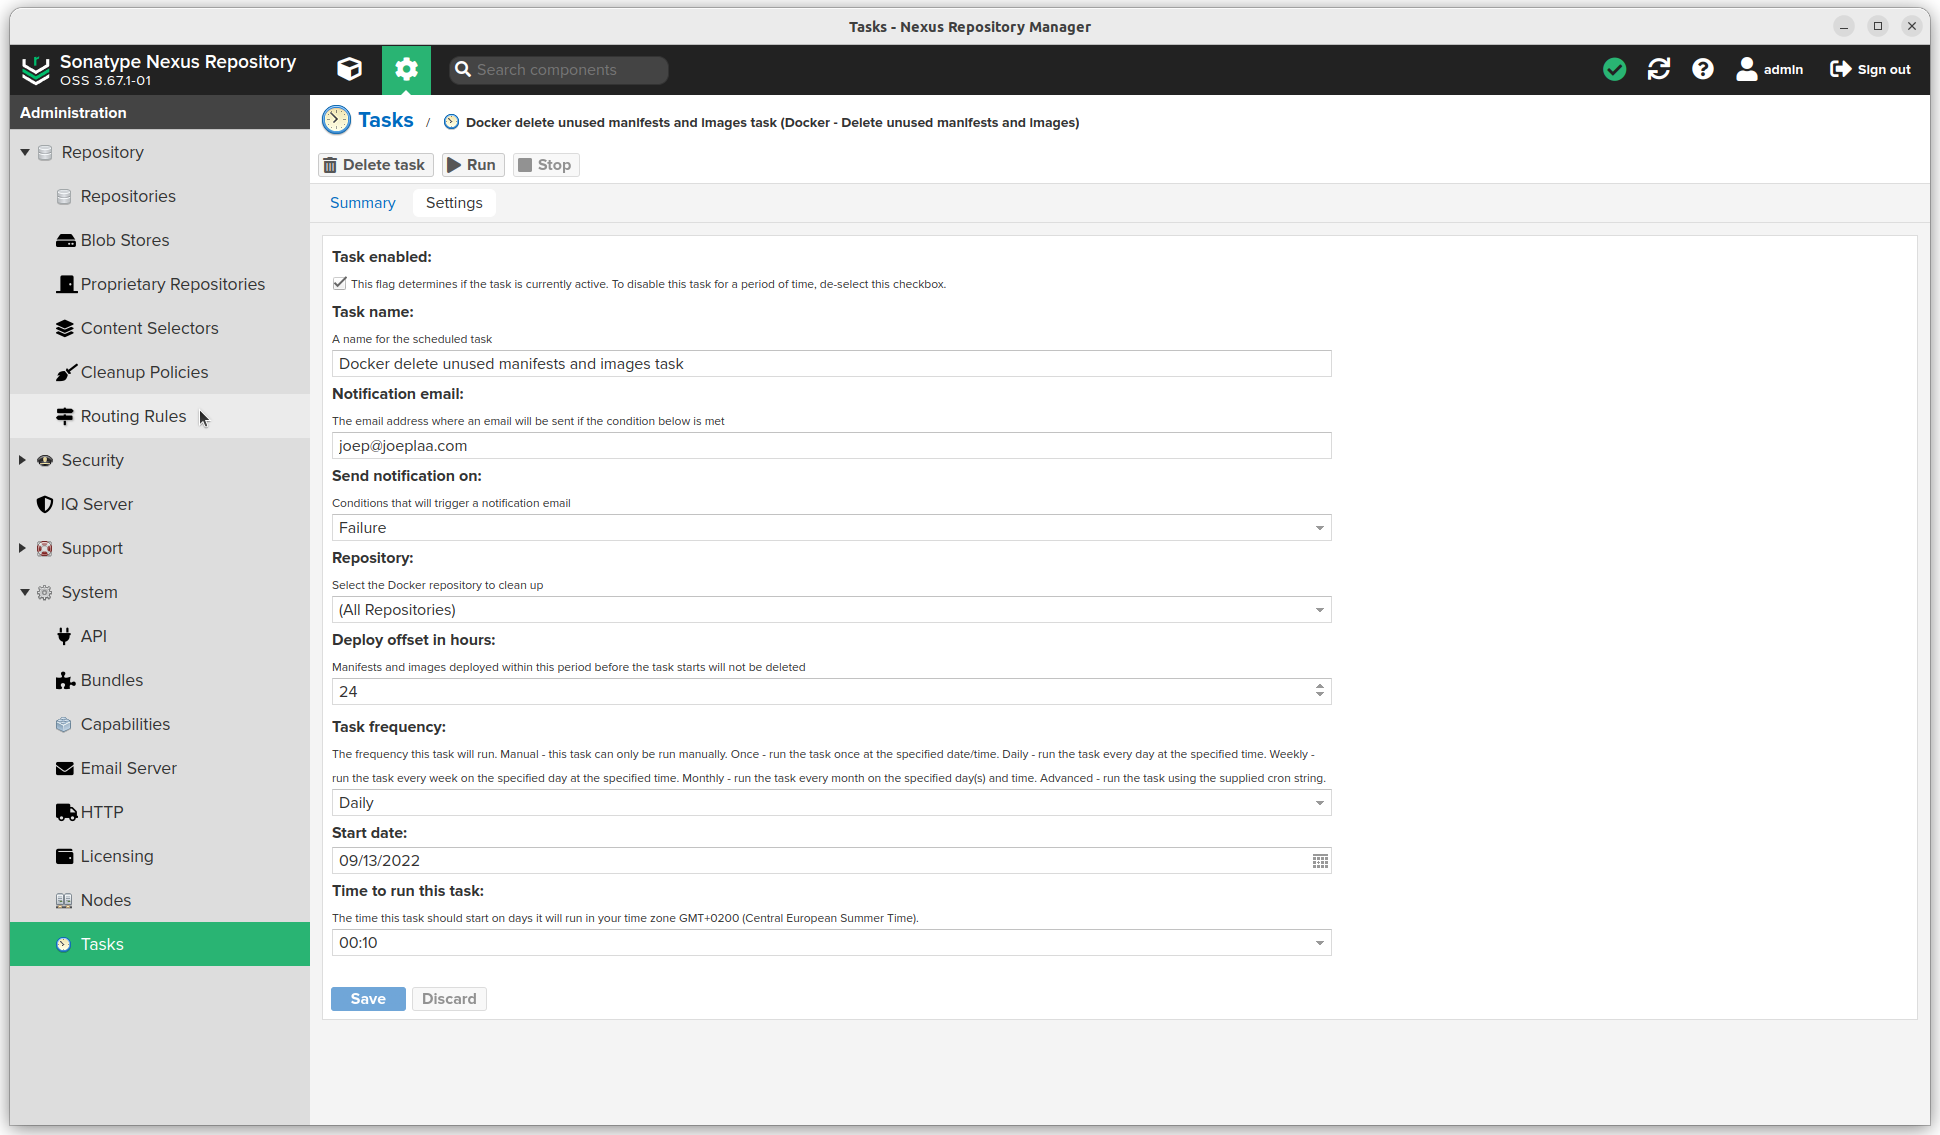
- Cleanup docker repos part 2: Docker - Delete unused manifests and images
Upload custom packages/images
Docker images
- Create a docker file for example this Nginx container to accompany a Wordpress site.
FROM sonatype.jodibooks.com/nginx:stable-alpine
LABEL maintainer="jodiBooks <sysadmin@jodibooks.com>"

# Import our settings
COPY nginx /etc/nginx

# WordPress container uses user and group `www-data` (id 82) to read, write and modify files with build in PHP engine.
# The standard Nginx container runs Nginx as user `nginx` (id 101) to read and write files. This makes setting file persmission on the host a nightmare.
# Solution: Build our own container with `www-data` (82) user and run nginx as that user (see nginx.conf). Source: https://stackoverflow.com/a/48958748
RUN set -x ; \
    addgroup -g 82 -S www-data ; \
adduser -u 82 -D -S -G www-data www-data && exit 0 ; exit 1- Build and tag the image
docker build -t sonatype.jodibooks.com/jodibooks/jodibeautypages-nginx .
docker tag sonatype.jodibooks.com/jodibooks/jodibeautypages-nginx:latest sonatype.jodibooks.com/jodibooks/jodibeautypages-nginx:1.0.0- Login to repository
docker login sonatype.jodibooks.com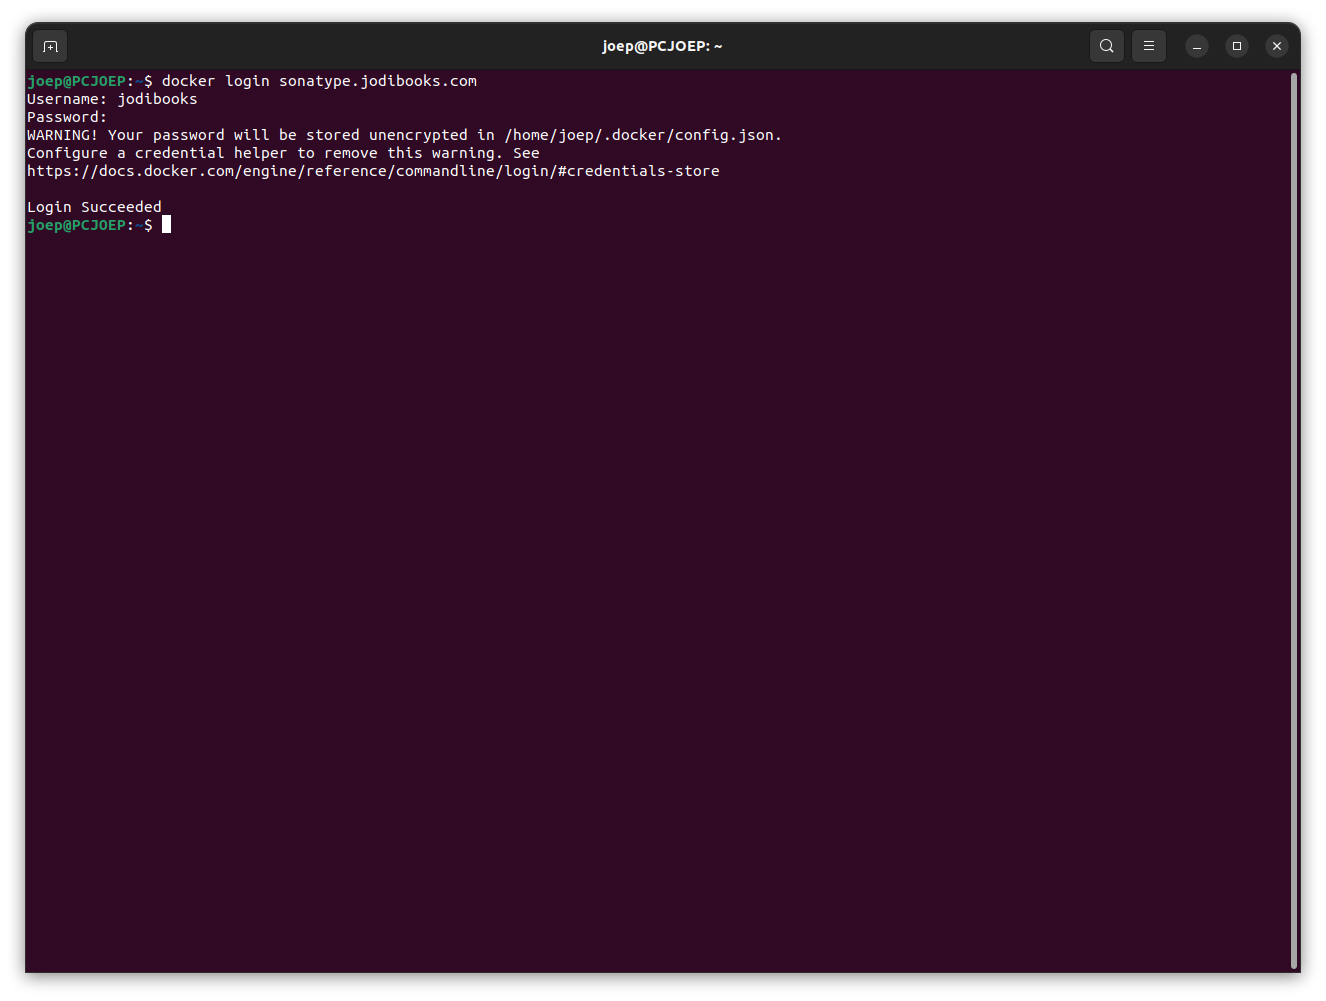
- Push the image
docker push sonatype.jodibooks.com/jodibooks/jodibeautypages-nginxNpm packages
- Build your package
- Login to repository
npm login --registry=https://sonatype.jodibooks.com/repository/npm-jodibooks/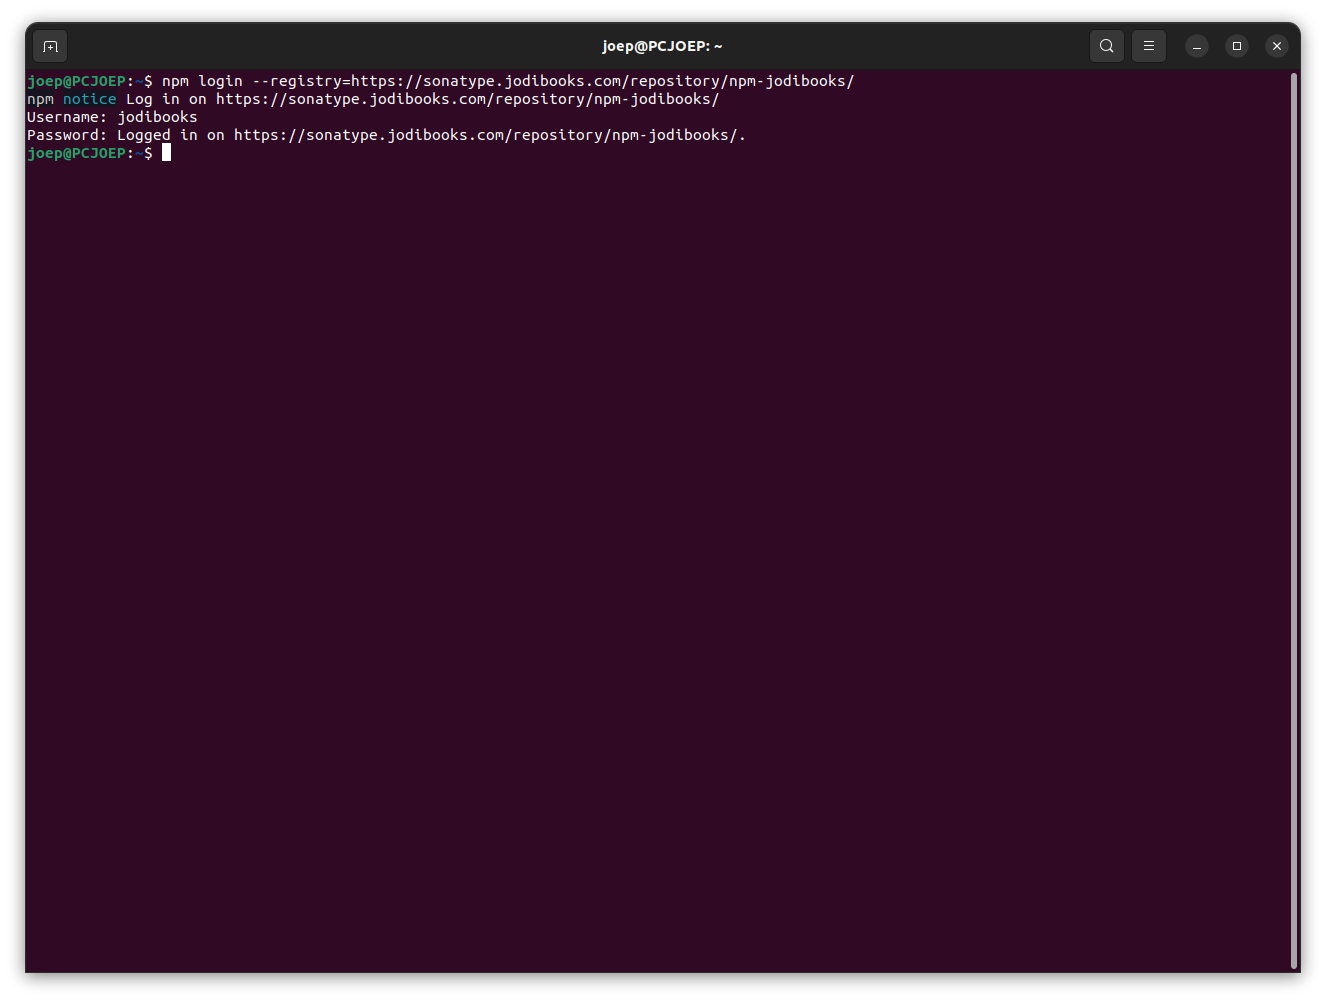
- Publish the package
npm publish --registry=https://sonatype.jodibooks.com/repository/npm-jodibooks/