Looking glass, RDP, GPU passthrough
I like Ubuntu as my primary operating system. Most software I use daily is available and the terminal is indispensable. I used Putty on Windows, but the Linux terminal, in my case Bash, feels superior.
There are however a few applications that do require Windows. Microsoft Office, IIS, Visual Studio (for .NET framework) and SQL Server Management Studio among others. To run these I used to have a VM on a Proxmox server and connected to it through VNC/RDP. However, performance was lackluster. I tried to optimize disk IO, tried to change remote desktop protocol and even added a dedicated GPU, but nothing really worked.
So in the end I bought a new PC and installed a fairly modern graphics card: a Nvidia Quadro M2000. It actually came with a P620, which should outperform the M2000, but the M2000 came with more RAM, 4GB vs 2GB for the P620.
Proxmox with two VM's
The initial idea was to install Proxmox and create two virtual machines on top of that. One would run Ubuntu 22.04, the other Windows 11. The M2000 would be split in two using the vGPU unlock script as described here. Initially this seemed to work fine as both operating systems recognized the virtual GPU's.
However, this approach had some major usability drawbacks. For starters, I had to use my laptop to start the remote desktop sessions to the VM's. And switching between remote desktops was clunky (I hate the top bar in the Windows RDP client that always pops up when I want to select a tab).
Another problem was that it didn't really gave me the performance I hoped for. It was laggy and the GPU's didn't seem to really do anything. You can enable hardware encoding of the RDP stream: https://taoofmac.com/space/protocols/rdp, and I even installed a the Thincast client which exposed this feature more user-friendly. This might have worked, but still the user-experience of having to use a separate computer just for the remote desktop was too circuitous.
Ubuntu with Windows VM
As Ubuntu was the primary OS anyway, I installed Ubuntu as the main OS and created a QEMU VM with Windows on top of that. Pretty straight-forward, until the bit with the GPU passthrough.
Using a remote desktop without being backed by a GPU wasn't an option as I wanted to use CAD software on the Windows VM. Here I bumped into the next issue; when enabling the dedicated GPU, the integrated GPU in the CPU is disabled, or the other way around. The OS still shows the iGPU, but can't use it. I think this is a specific Lenovo issue though as I read somewhere (can't find it now) that Lenovo only unlocks this feature on higher positioned models of their desktop systems.
I thus added the P620 back into the PC. After some juggling GPU's around, I ended up with the P620 in the main GPU slot and the M2000 in the bottom x4 slot. This slot is severely limited in bandwidth as it is also connected through the PCH, but it gets the job done. The order was determined by the OS/BIOS... Ubuntu would always take/get the first GPU it would find (from top slot to bottom). I don't need much RAM on Ubuntu, but did want the more modern encoder features for video encoding.
For GPU passthrough instructions, Google your specific OS. Here are some I based my configuration on.
 Mathias Hueber
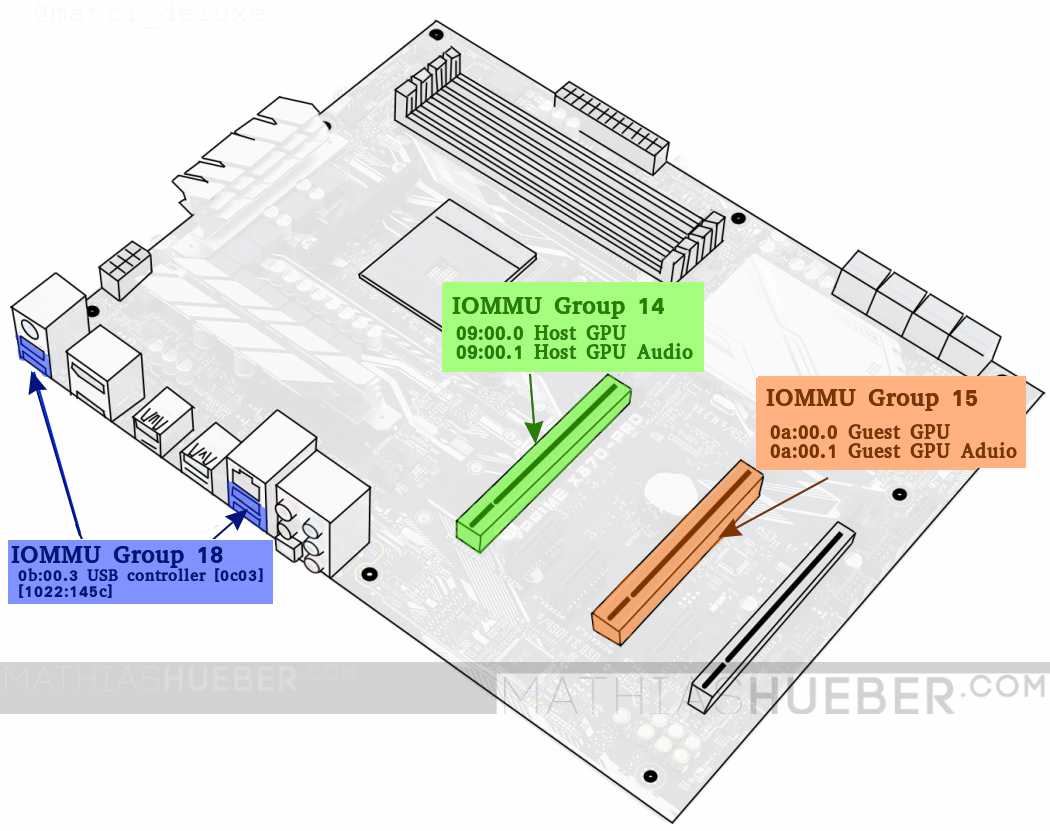
Part 1: using RDP
I started using this setup with an RDP session using Remmina and the earlier mention hardware encoding settings, which kind of worked. However, this was still not snappy and still didn't feel right. As the VM now ran on modern hardware and locally, I expected more.
I than tried using the Moonlight - Sunshine combination. This is THE open source solution to play games on remote desktops, so this should be snappy and responsive. I forgot what the actual problem was, but I abandoned this too. I think switching between desktops was too jarring for me (not a Moonlight issue, I have the same with every remote desktop app) and the connection wasn't completely stable.
Part 2: Looking glass
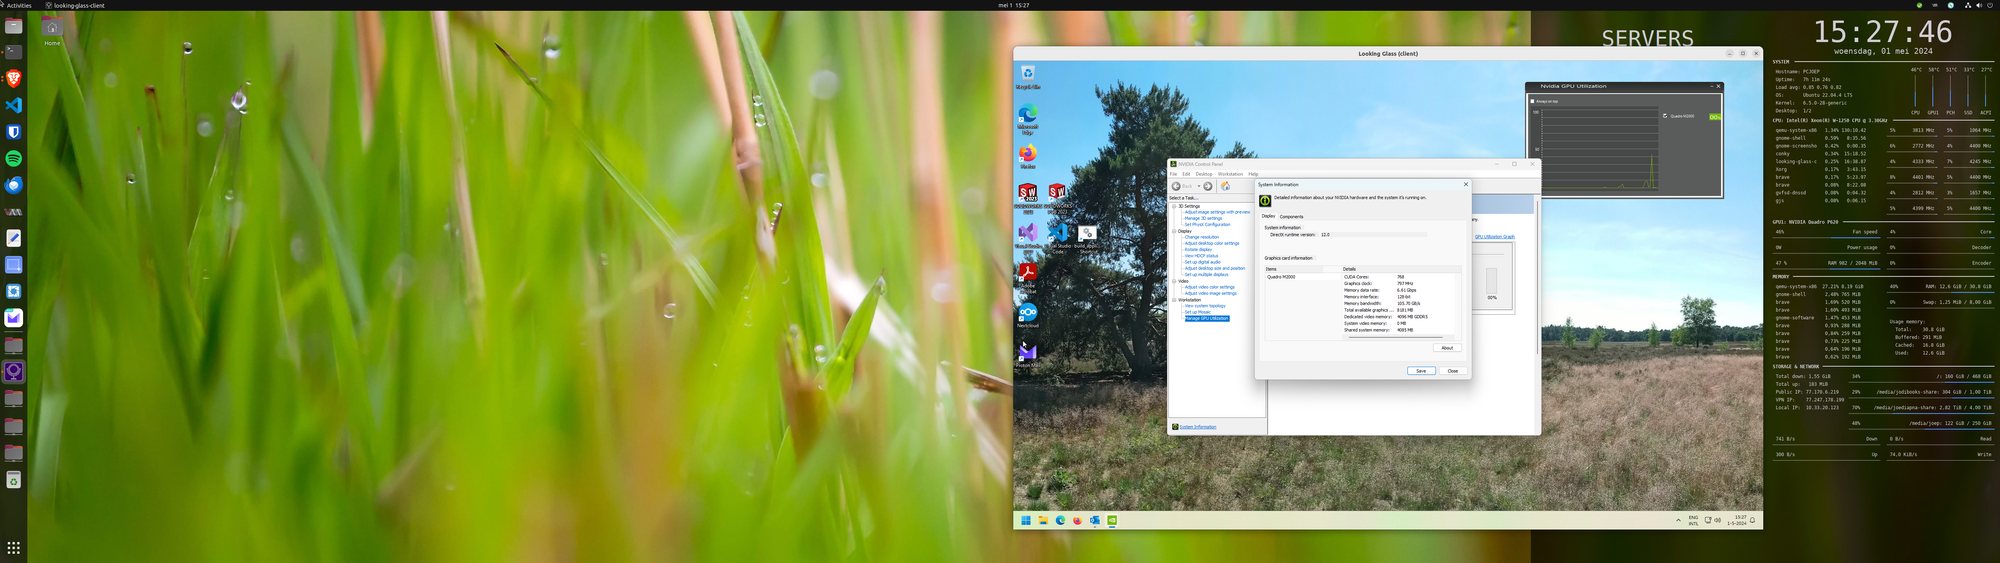
Enter Looking glass. This promised to run my VM as a regular application. And yes, it does. Setting it up wasn't as easy as I hoped, but well worth it. It feels like a native application, barring the additional mouse click to enter the window.
Looking glass install
If you think about it carefully, it is obvious, but the Looking glass host has to be installed in the client machine, the Windows VM in my case. The Looking glass client has to be installed on the host machine, the Ubuntu OS.
Looking glass host (Windows)
- Open the
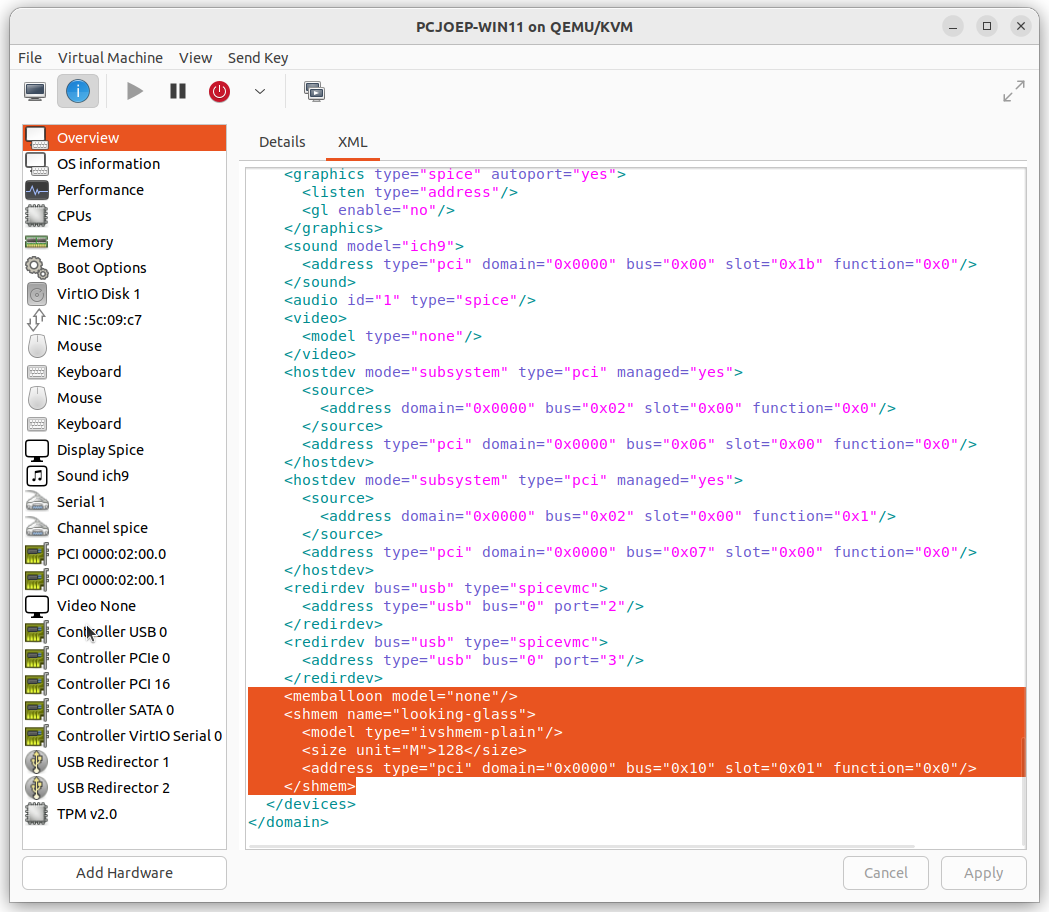
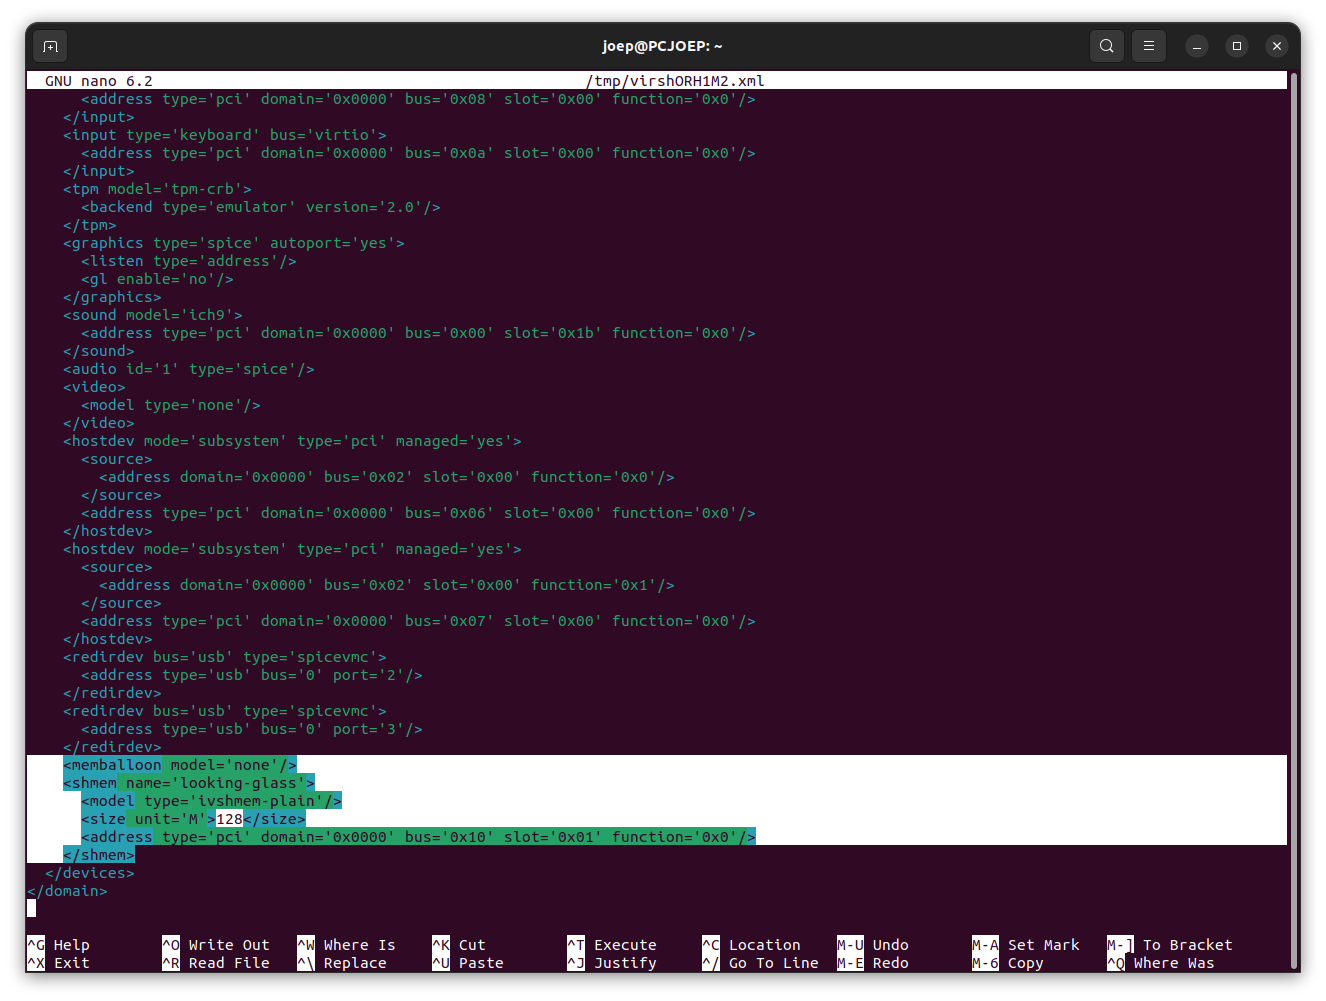
.xmlfor your VM. Either in the GUI or terminal,virsh edit PCJOEP-WIN11, and:- disable memory ballooning:
<memballoon model="none" /> - define the shared memory size:
<shmem name ... /> - passthrough the GPU
- add virtio input devices
- link/synchronize clipboards
- etc. See https://looking-glass.io/docs/B6/install/#installation for all details.
- disable memory ballooning:
- Download the Windows host binary from the downloads page and install.
- Download and install
spice-guest-tools-latest.exeto enable clipboard sharing between host and guest. You might need to re-open the Looking glass window. In the current version, B6, I have to re-install these tools often to re-enable the clipboard.
Looking glass client (Ubuntu)
- Download the Source archive from the downloads page.
- Untar it:
tar -xzvf looking-glass-B6.tar.gz - Install build dependencies:
apt-get install binutils-dev cmake fonts-dejavu-core libfontconfig-dev \
gcc g++ pkg-config libegl-dev libgl-dev libgles-dev libspice-protocol-dev \
nettle-dev libx11-dev libxcursor-dev libxi-dev libxinerama-dev \
libxpresent-dev libxss-dev libxkbcommon-dev libwayland-dev wayland-protocols \
libpipewire-0.3-dev libpulse-dev libsamplerate0-dev- Build the application:
cd looking-glass-B6
mkdir build
cd build
cmake ../
make- Move
looking-glass-clientto yourbinfolder, for example/usr/local/bin/looking-glass-client - Create a shell script:
nano /home/<user>/scripts/lg-helper.sh
#!/bin/sh
export DISPLAY=:1 # change to your display port if different!
sleep 5  # can change delay depending on host
looking-glass-client win:size=1920x1200 -a yes- Create a service file:
sudo nano /etc/systemd/system/looking-glass.service
[Unit]
Description=Looking Glass workaround
After=libvirt.service
Wants=libvirt.service

[Service]
Type=simple
# change to your username and group!
User=joep
Group=joep
# change to your path!
ExecStart=/home/joep/scripts/lg-helper.sh

[Install]
WantedBy=default.target- Open
.bashrcand add alias to start looking-glass service:
#Looking glass
alias looking-glass='sudo systemctl start looking-glass'
How to use
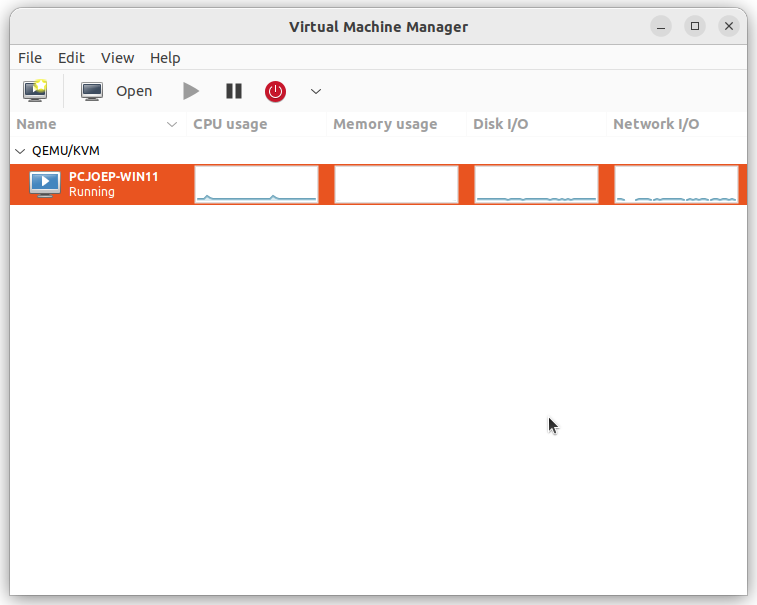
Start the Window VM using the command line or more easily through the Virtual Machine Manager.
Open a terminal and type: looking-glass and enter your sudo password.
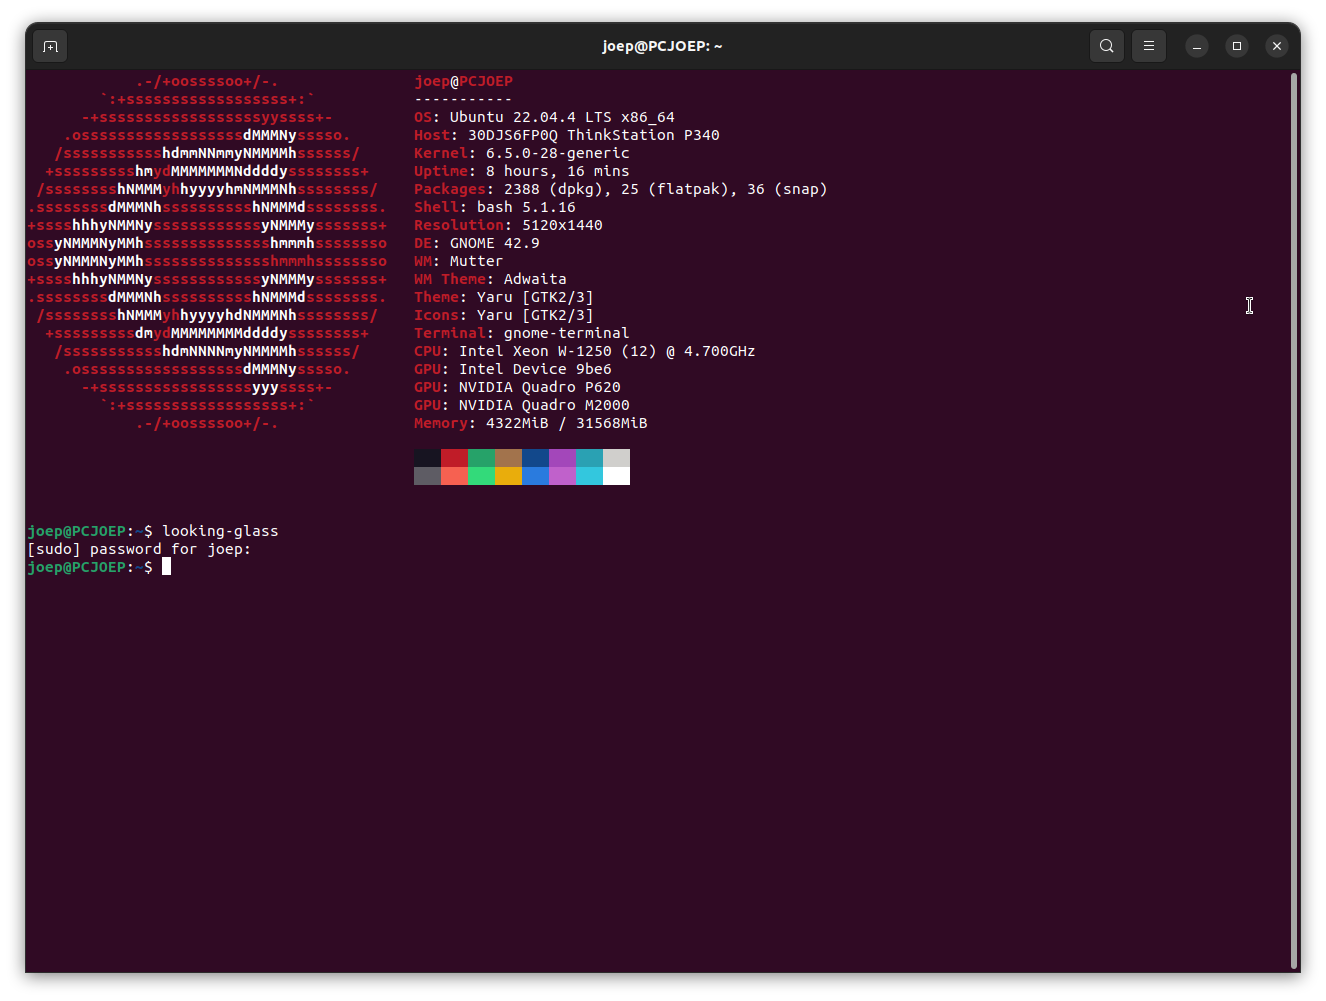
After 5 seconds a screen with Windows login page appears.